The problem: we need a street-accessible EV charger
We moved into our new house in April, and it’s been great: all the additional space we need, an office for both of us, etc. One thing it doesn’t have is any off-street parking, which is no big deal except for the problem of how to charge my car. At the old place, there was a driveway that went by the side of the house, and so we had a professional install a charger there.
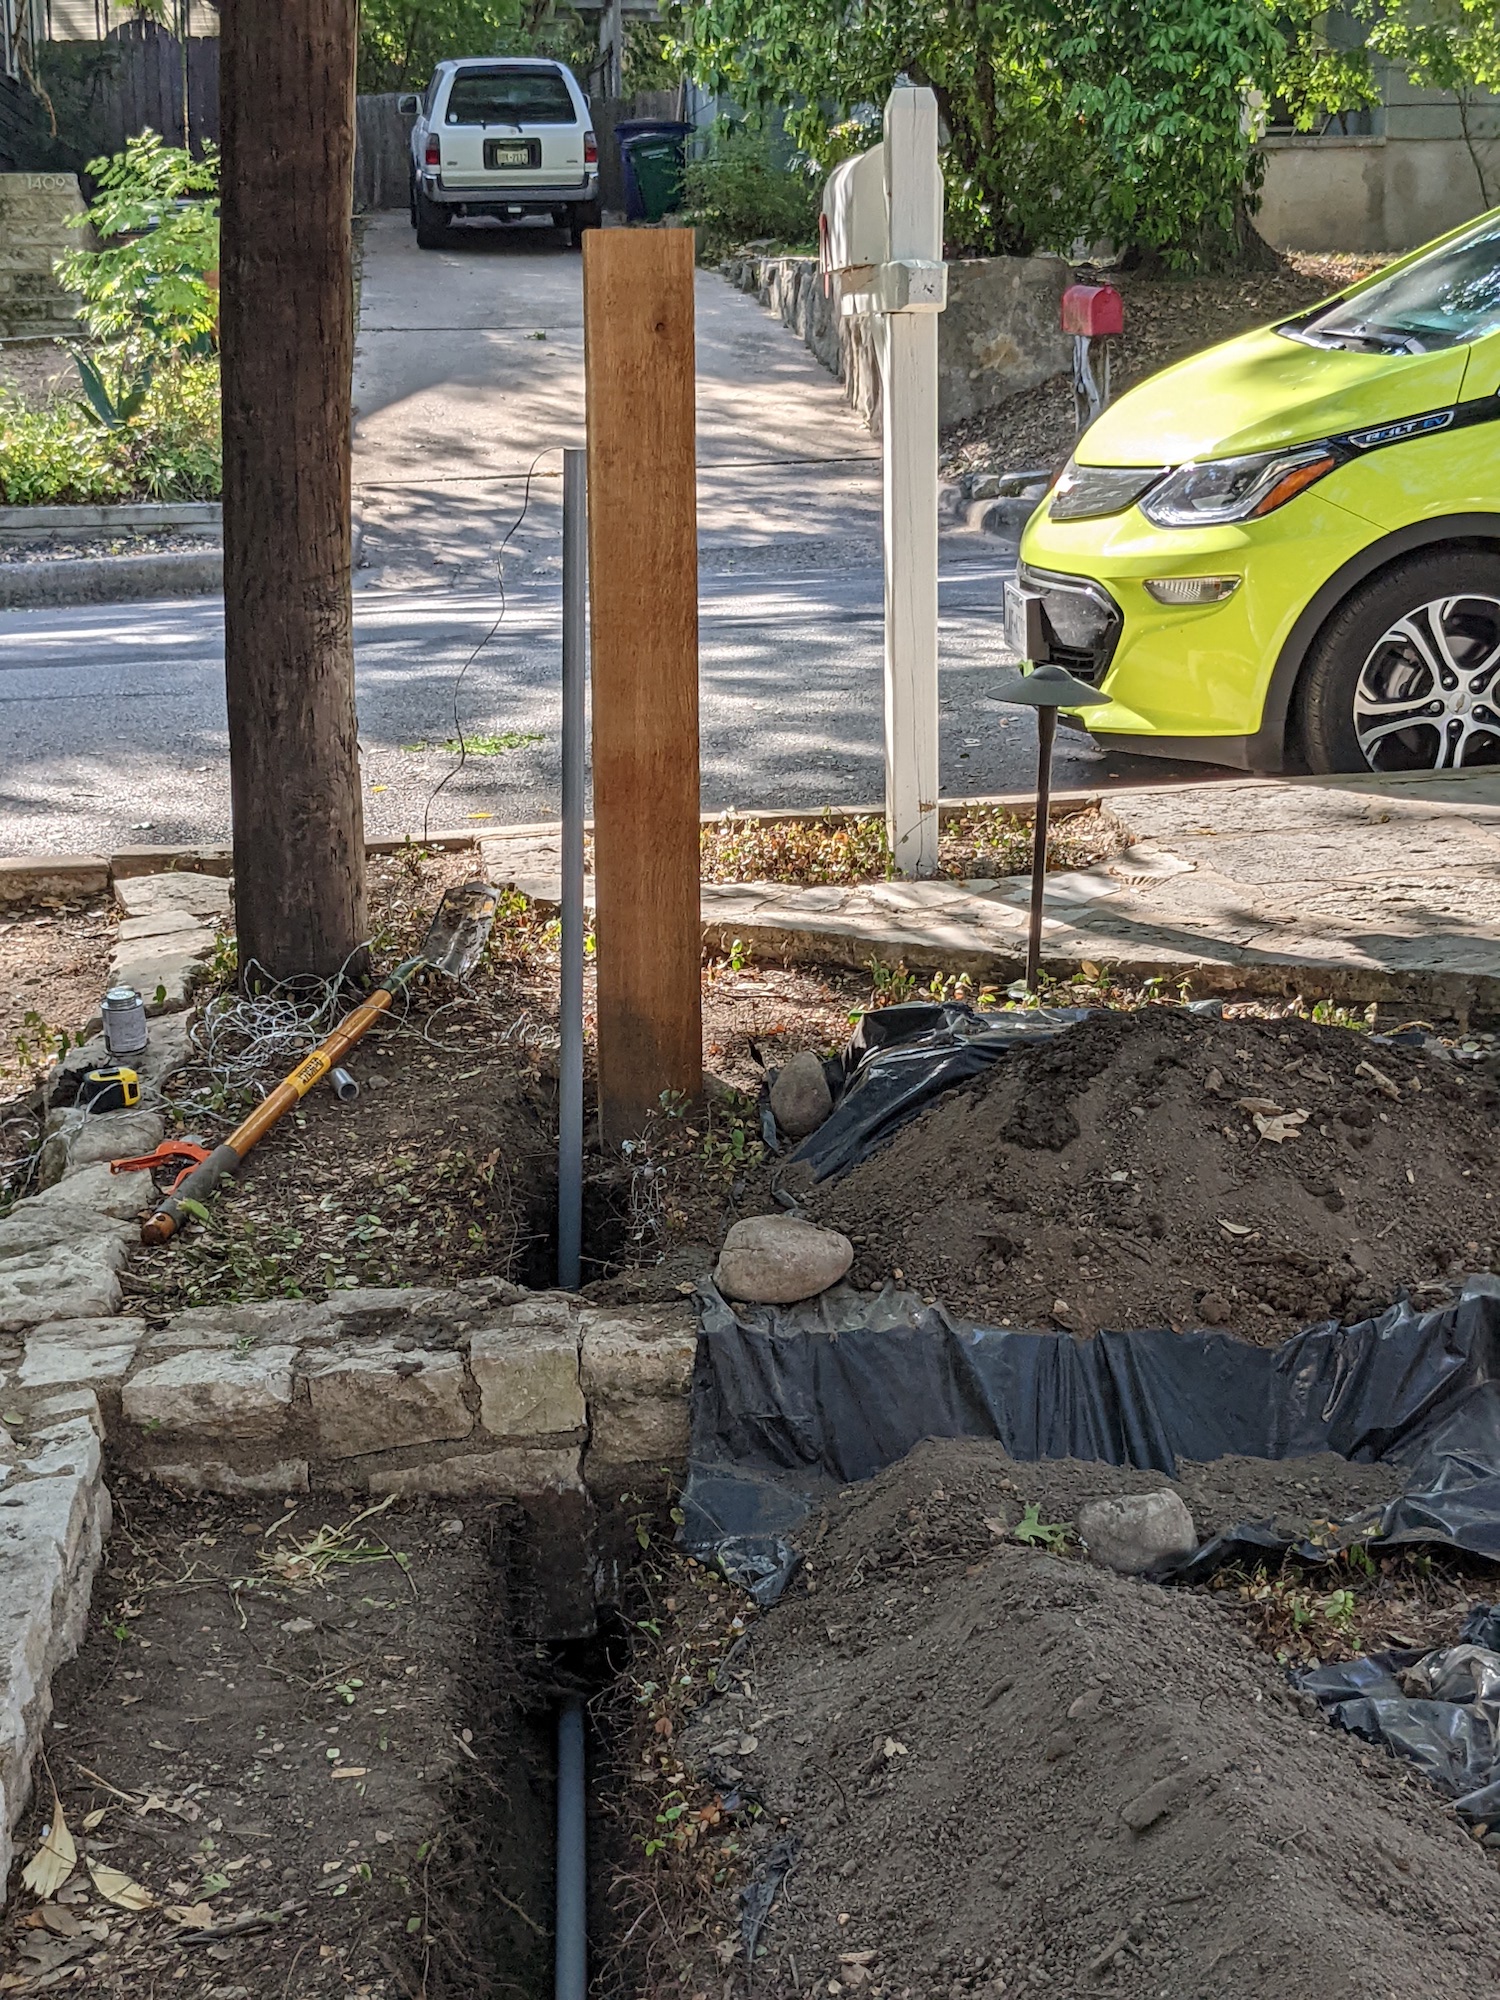
At our new place, the curb where we park the cars is about 50 feet away from the electrical service box on the side of the house:
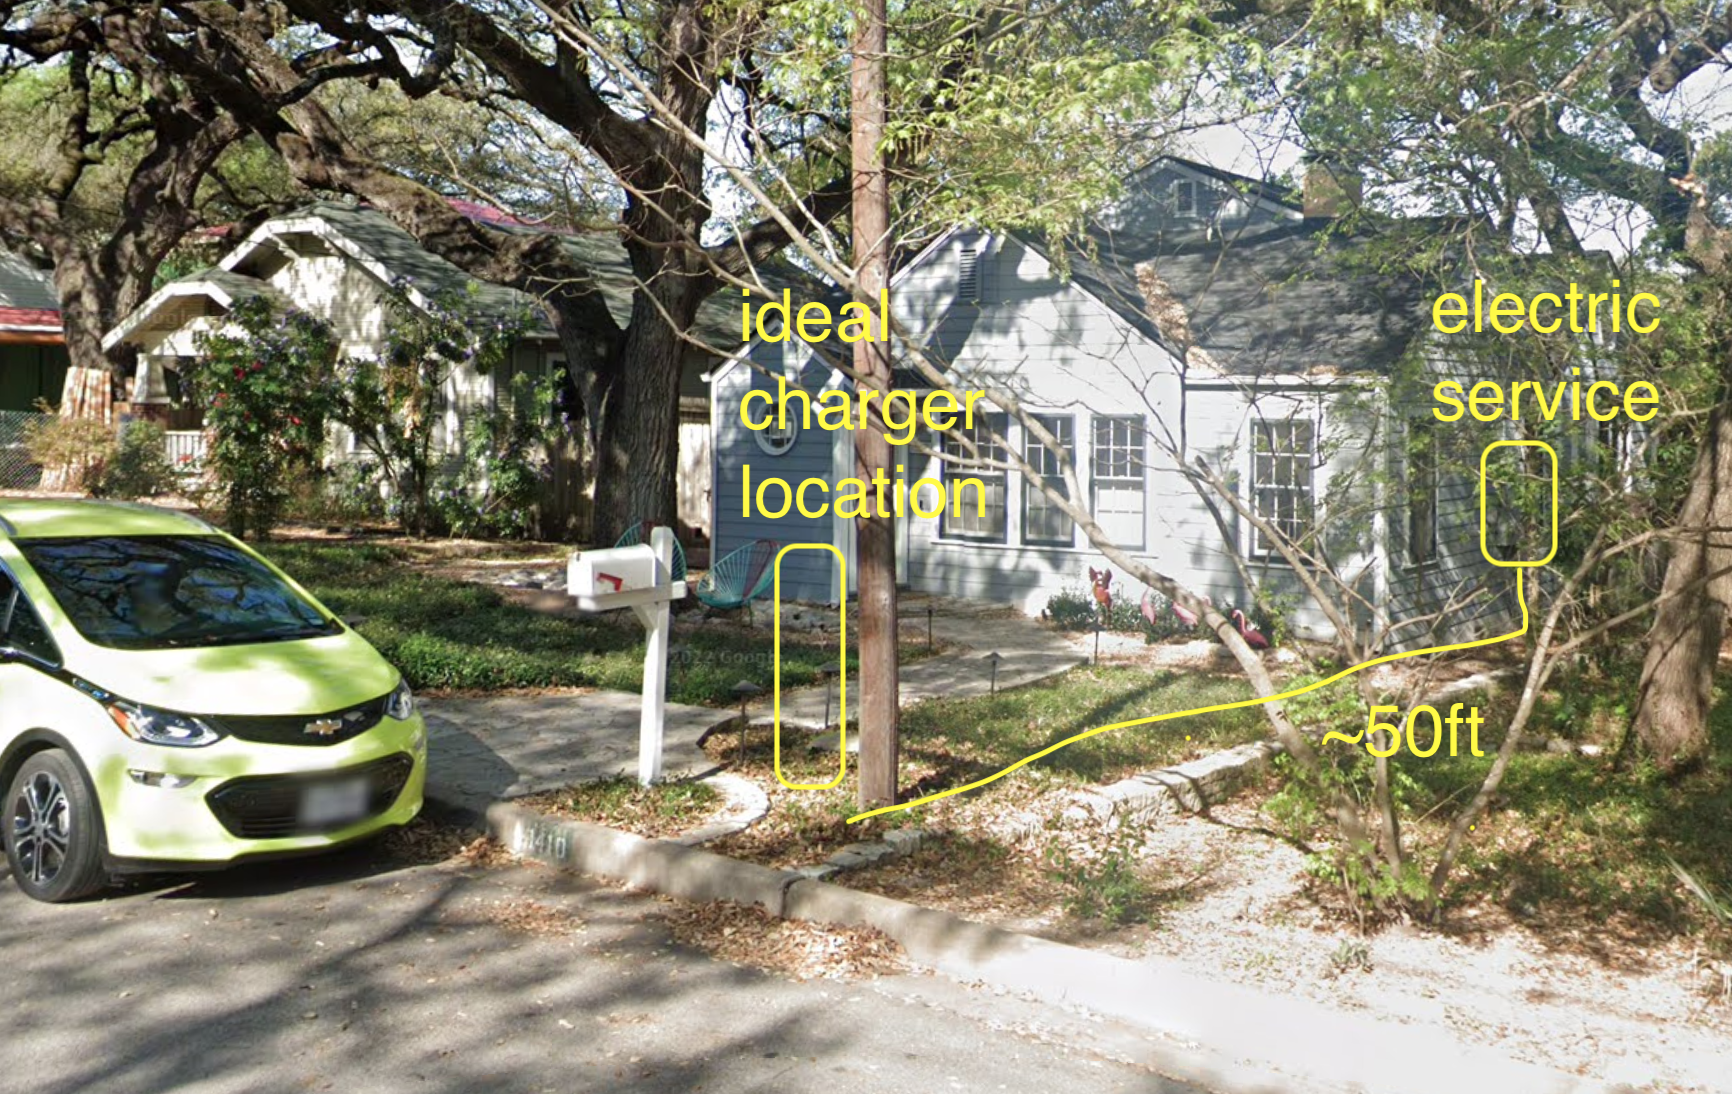
I had a couple of bids done on installing an EV charger at the location marked. One came in at $3300, the other at $4000, both excluding the cost of trenching and the charger itself. Considering that I paid only about $1500 at the old house including the charger, and got half of that back in a rebate, this was high enough to trigger my DIY project impulse.
Electrical requirements
Obviously adding a high-amperage outdoor electrical circuit is something you should not do unless you’re a licensed electrician. Then again, this is basically the same thing as adding a circuit for a hot tub in your backyard, and that’s definitely something I’d be willing to DIY. So off I went learning enough about electrical code, conductors, and conduit to understand what the physical parameters of the project.
- Distance: the ground distance from the electric service to my intended location was 45ft. I figured I should get 60ft worth of conductors to be safe–it turns out this was barely enough. I would measure more carefully for bends and rise heights next time.
- Circuit amperage: 60A (48A useable). My Chevy Bolt can only use 32A, but this gives me headroom for the next EV. Our house has 200A service with plenty of headroom–there was a 40A circuit previously dedicated to a jacuzzi bath that’s now unused.
- Conductors: Three 60-ft 4-gauge THHN for two hots and a neutral plus one 60-ft 8-gauge THHN for ground. This gauge/jacket/length is actually good for at least 80A and probably more. Although the neutral isn’t required for charging, it allowed me to put a 115V outlet on the post as well as the charger, which I can use to plug in a vacuum for cleaning.
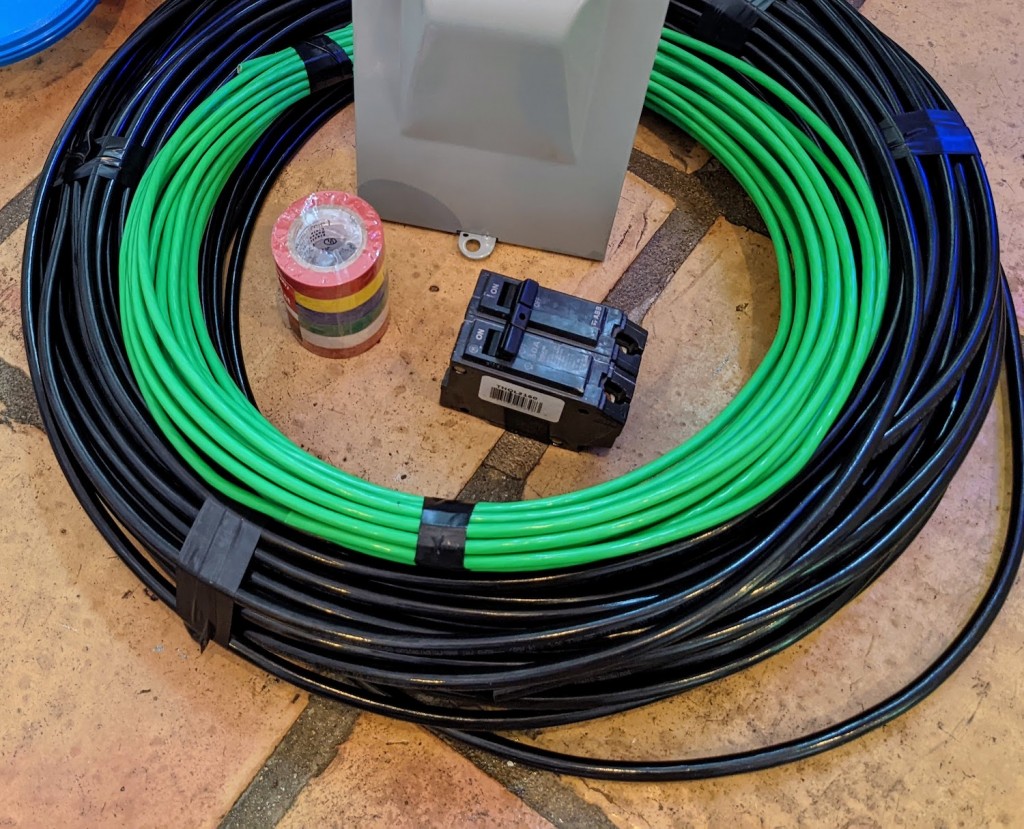
- Conduit: to accommodate the super-fat 4-gauge conductors, I selected 1.5 inch PVC (schedule 80/thick-walled) conduit. The use of PVC meant I needed to bury the conduit 18 inches below grade, as opposed only 6" required for metal. Although this had big implications for how much digging I needed to do, it felt safer to have the conduit far below the surface. Even though according to a conduit fill calculator I had plenty of space, it turned out to be pretty tough to get all the conductors through even with lubricant. Because the hole I dug would have been the same size, if I did it again I would have selected 2" conduit instead.
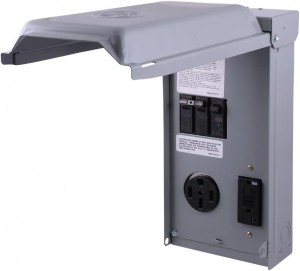
- Subpanel: I decided to install a subpanel on the charger post. It’s not necessary. For safety, you’d at least want an A/C disconnect on the post to quickly cut off the live circuit. What the subpanel buys is another circuit breaker (that also provides disconnect functionality) as well as receptacles. I chose the GE1LU502SS, with both a NEMA 14-50 (50A) and traditional 115V, 20A receptacle. This allows me to connect the charger as well as an appliance at the curb if I want.
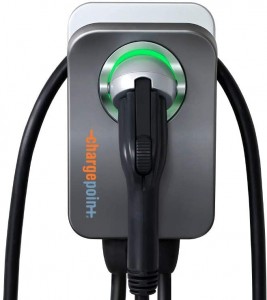
- EV Charger: I went with the Chargepoint Home Flex because it can support up to 50A, I like their app, and I had a good experience with a similar model installed outdoors at my old house.
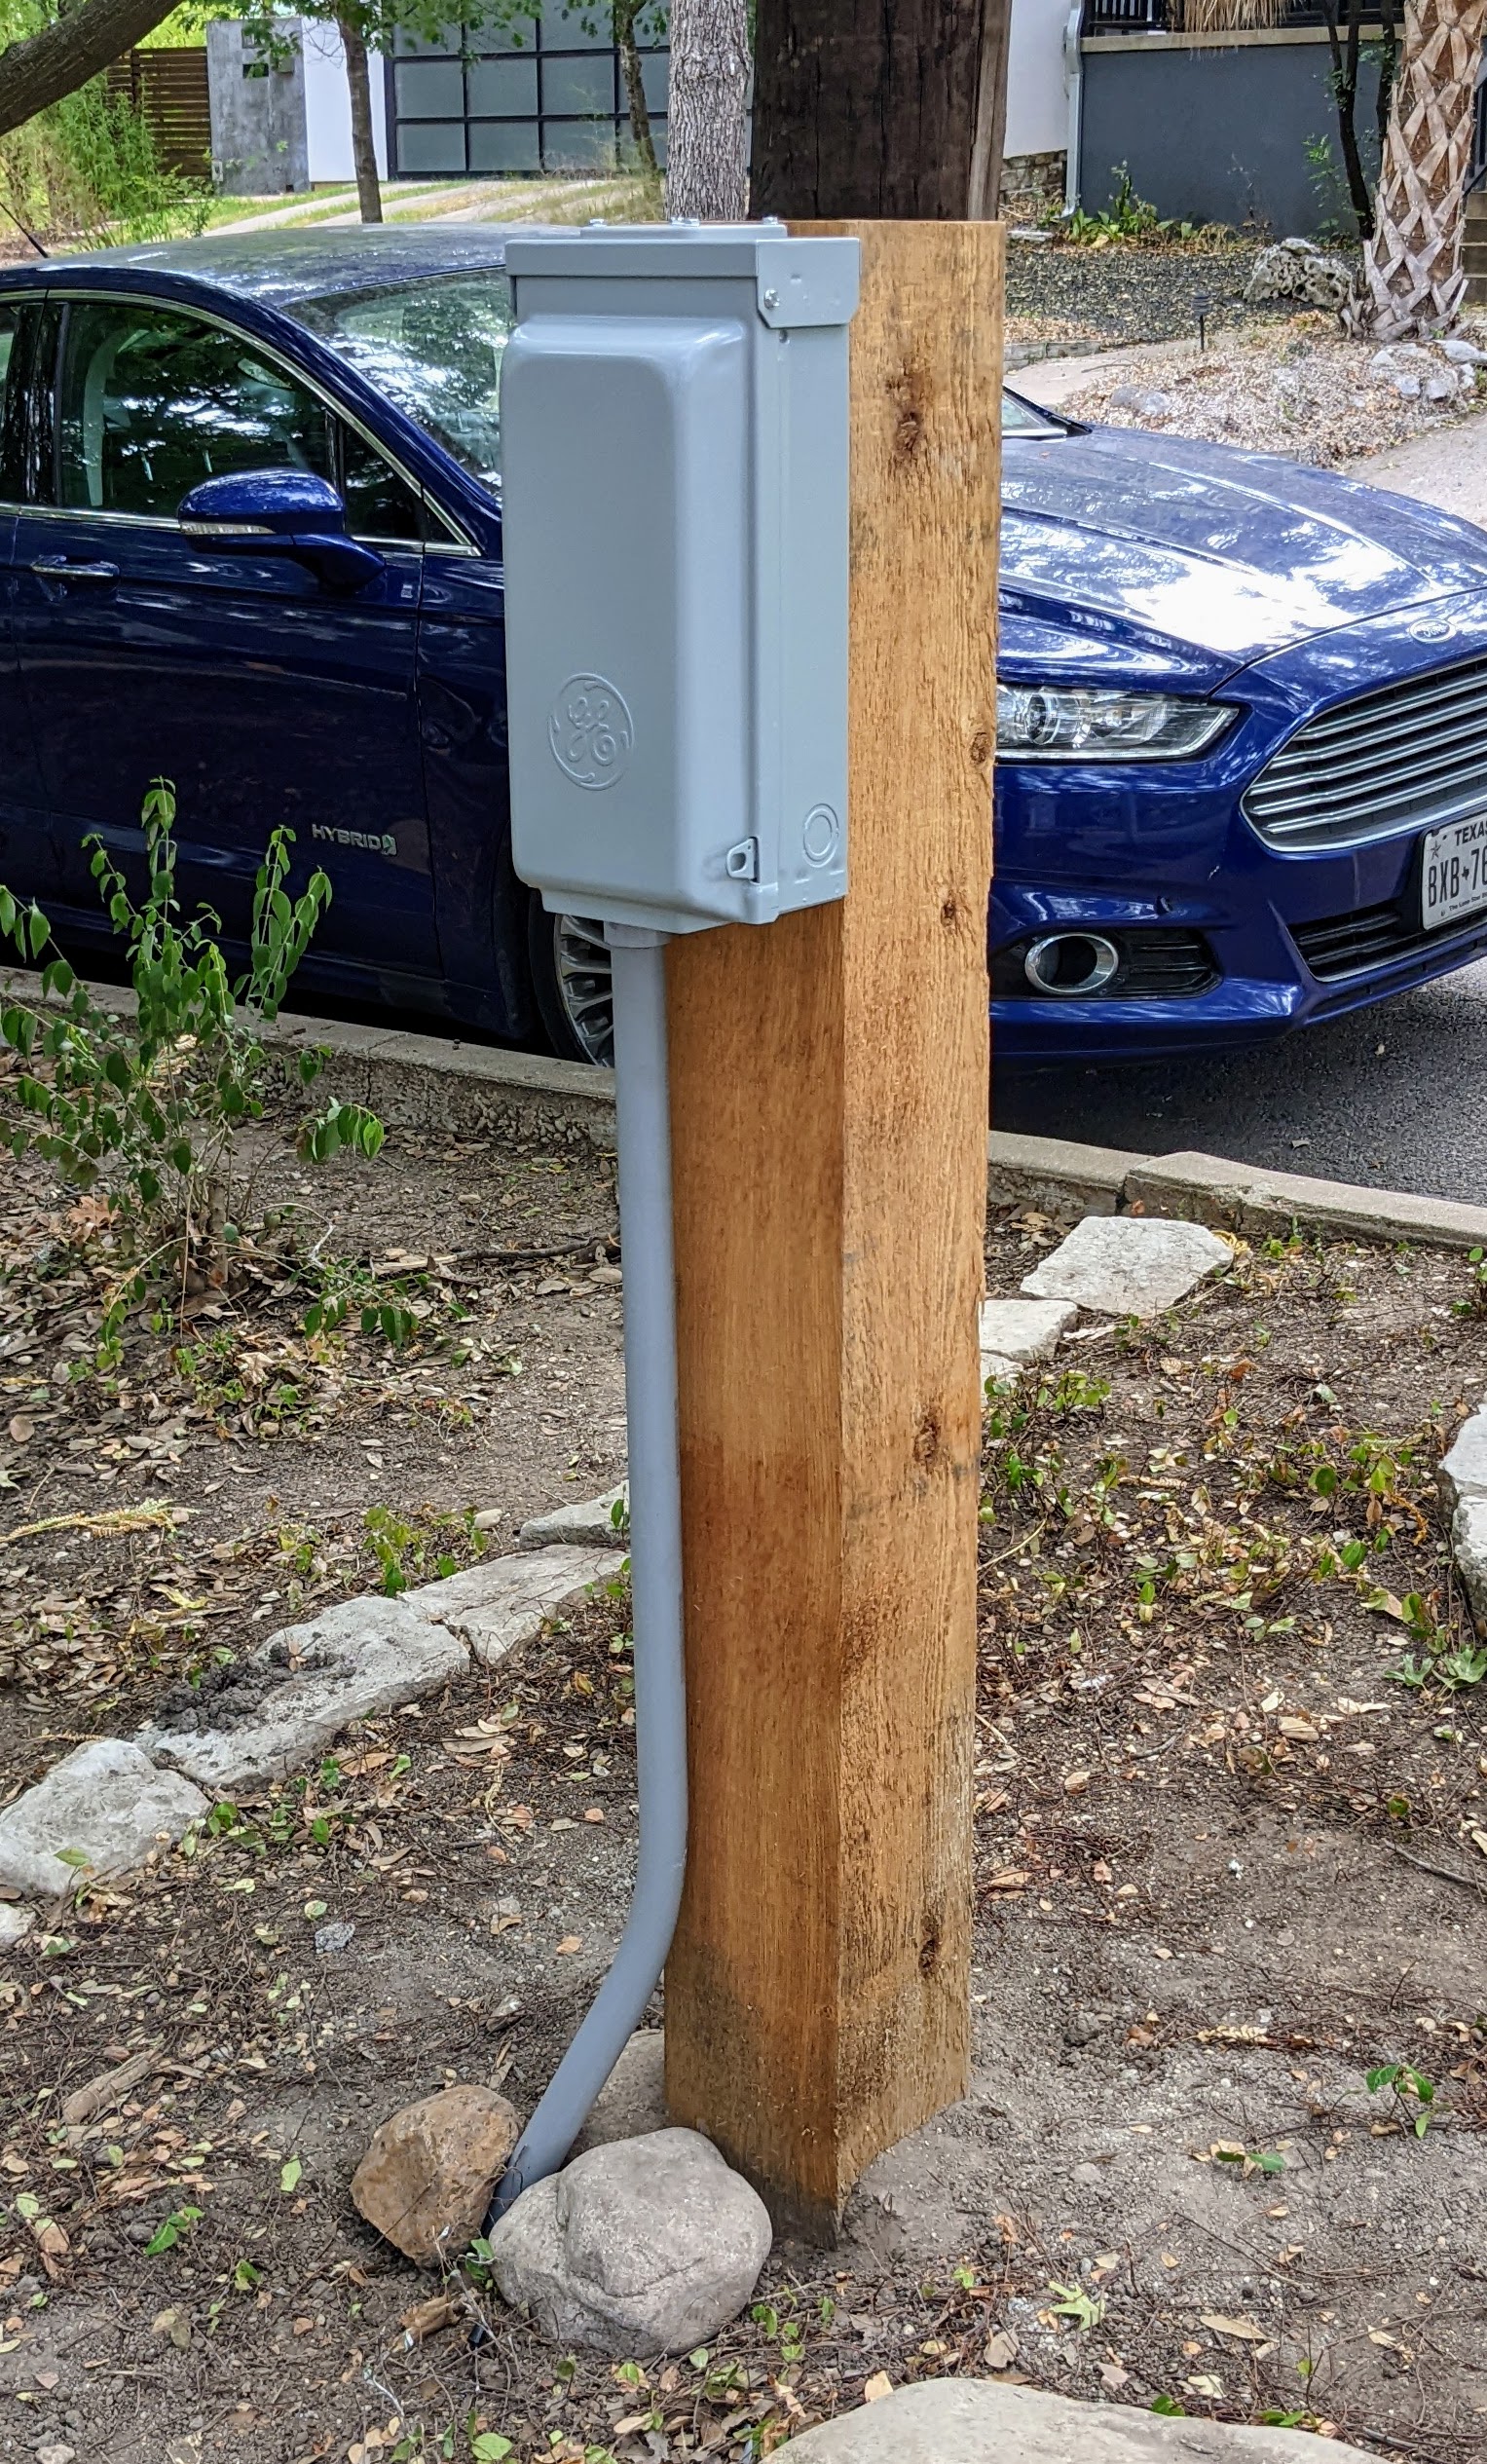
Setting the post
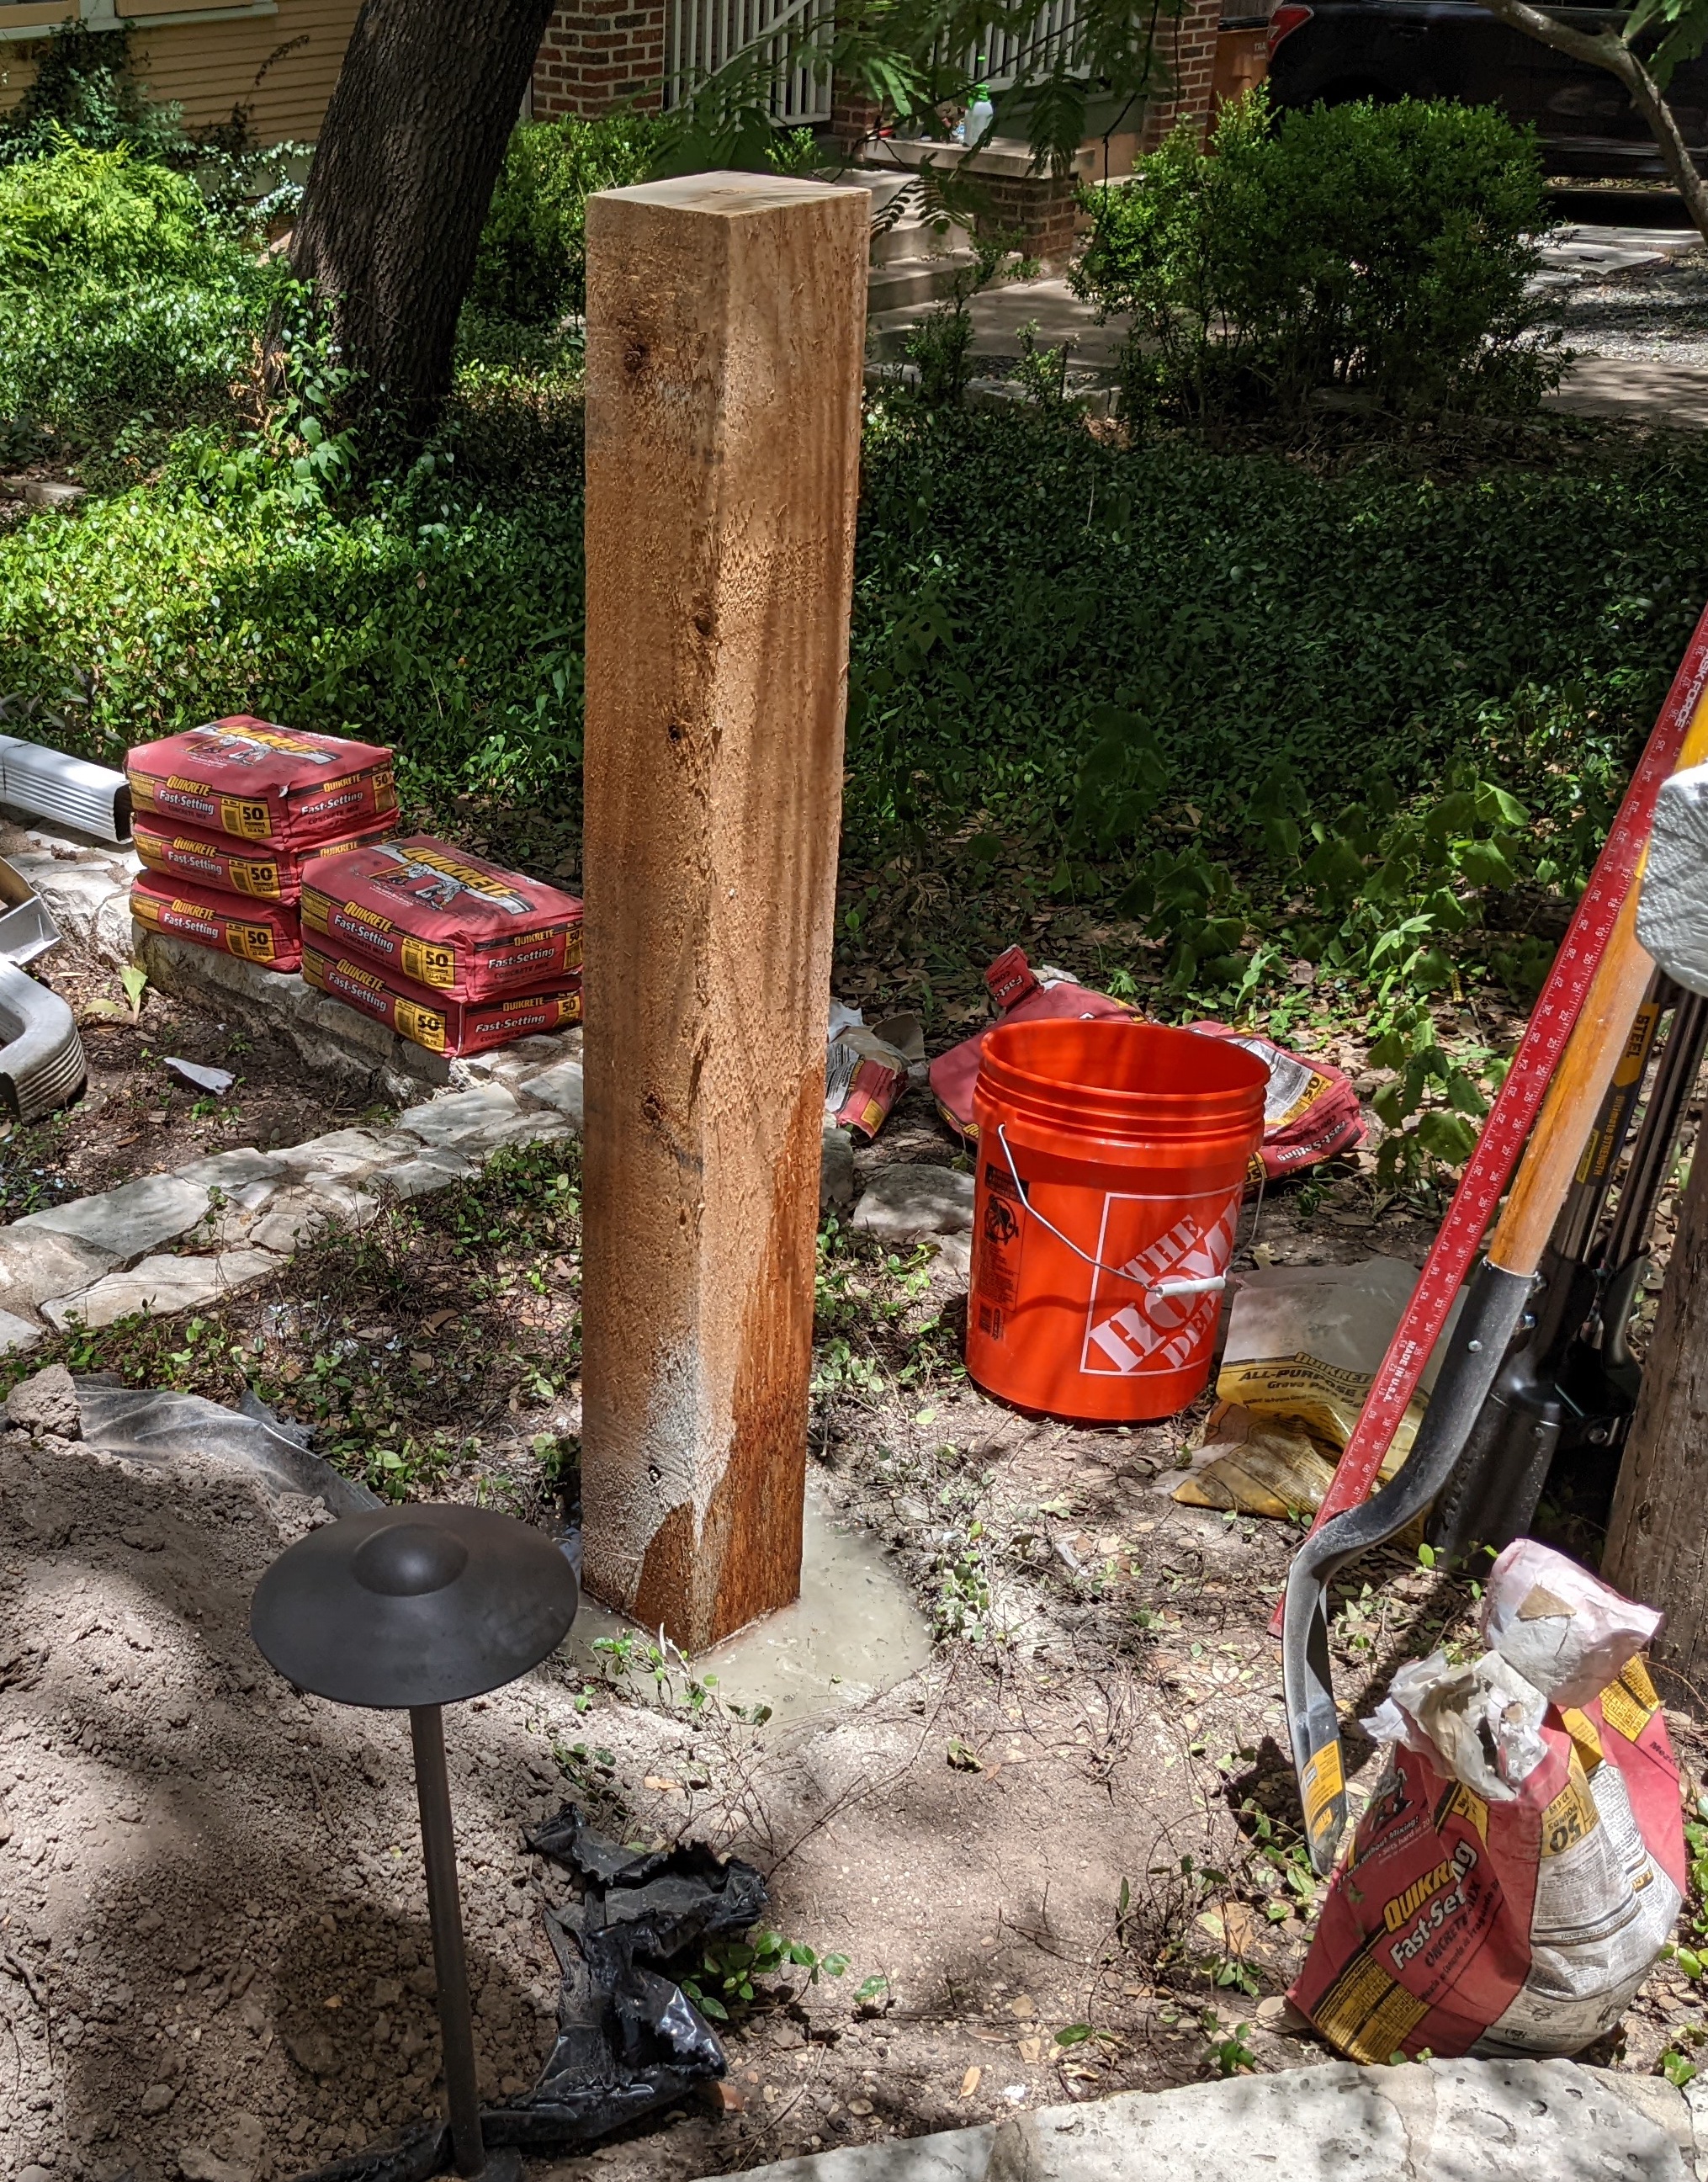
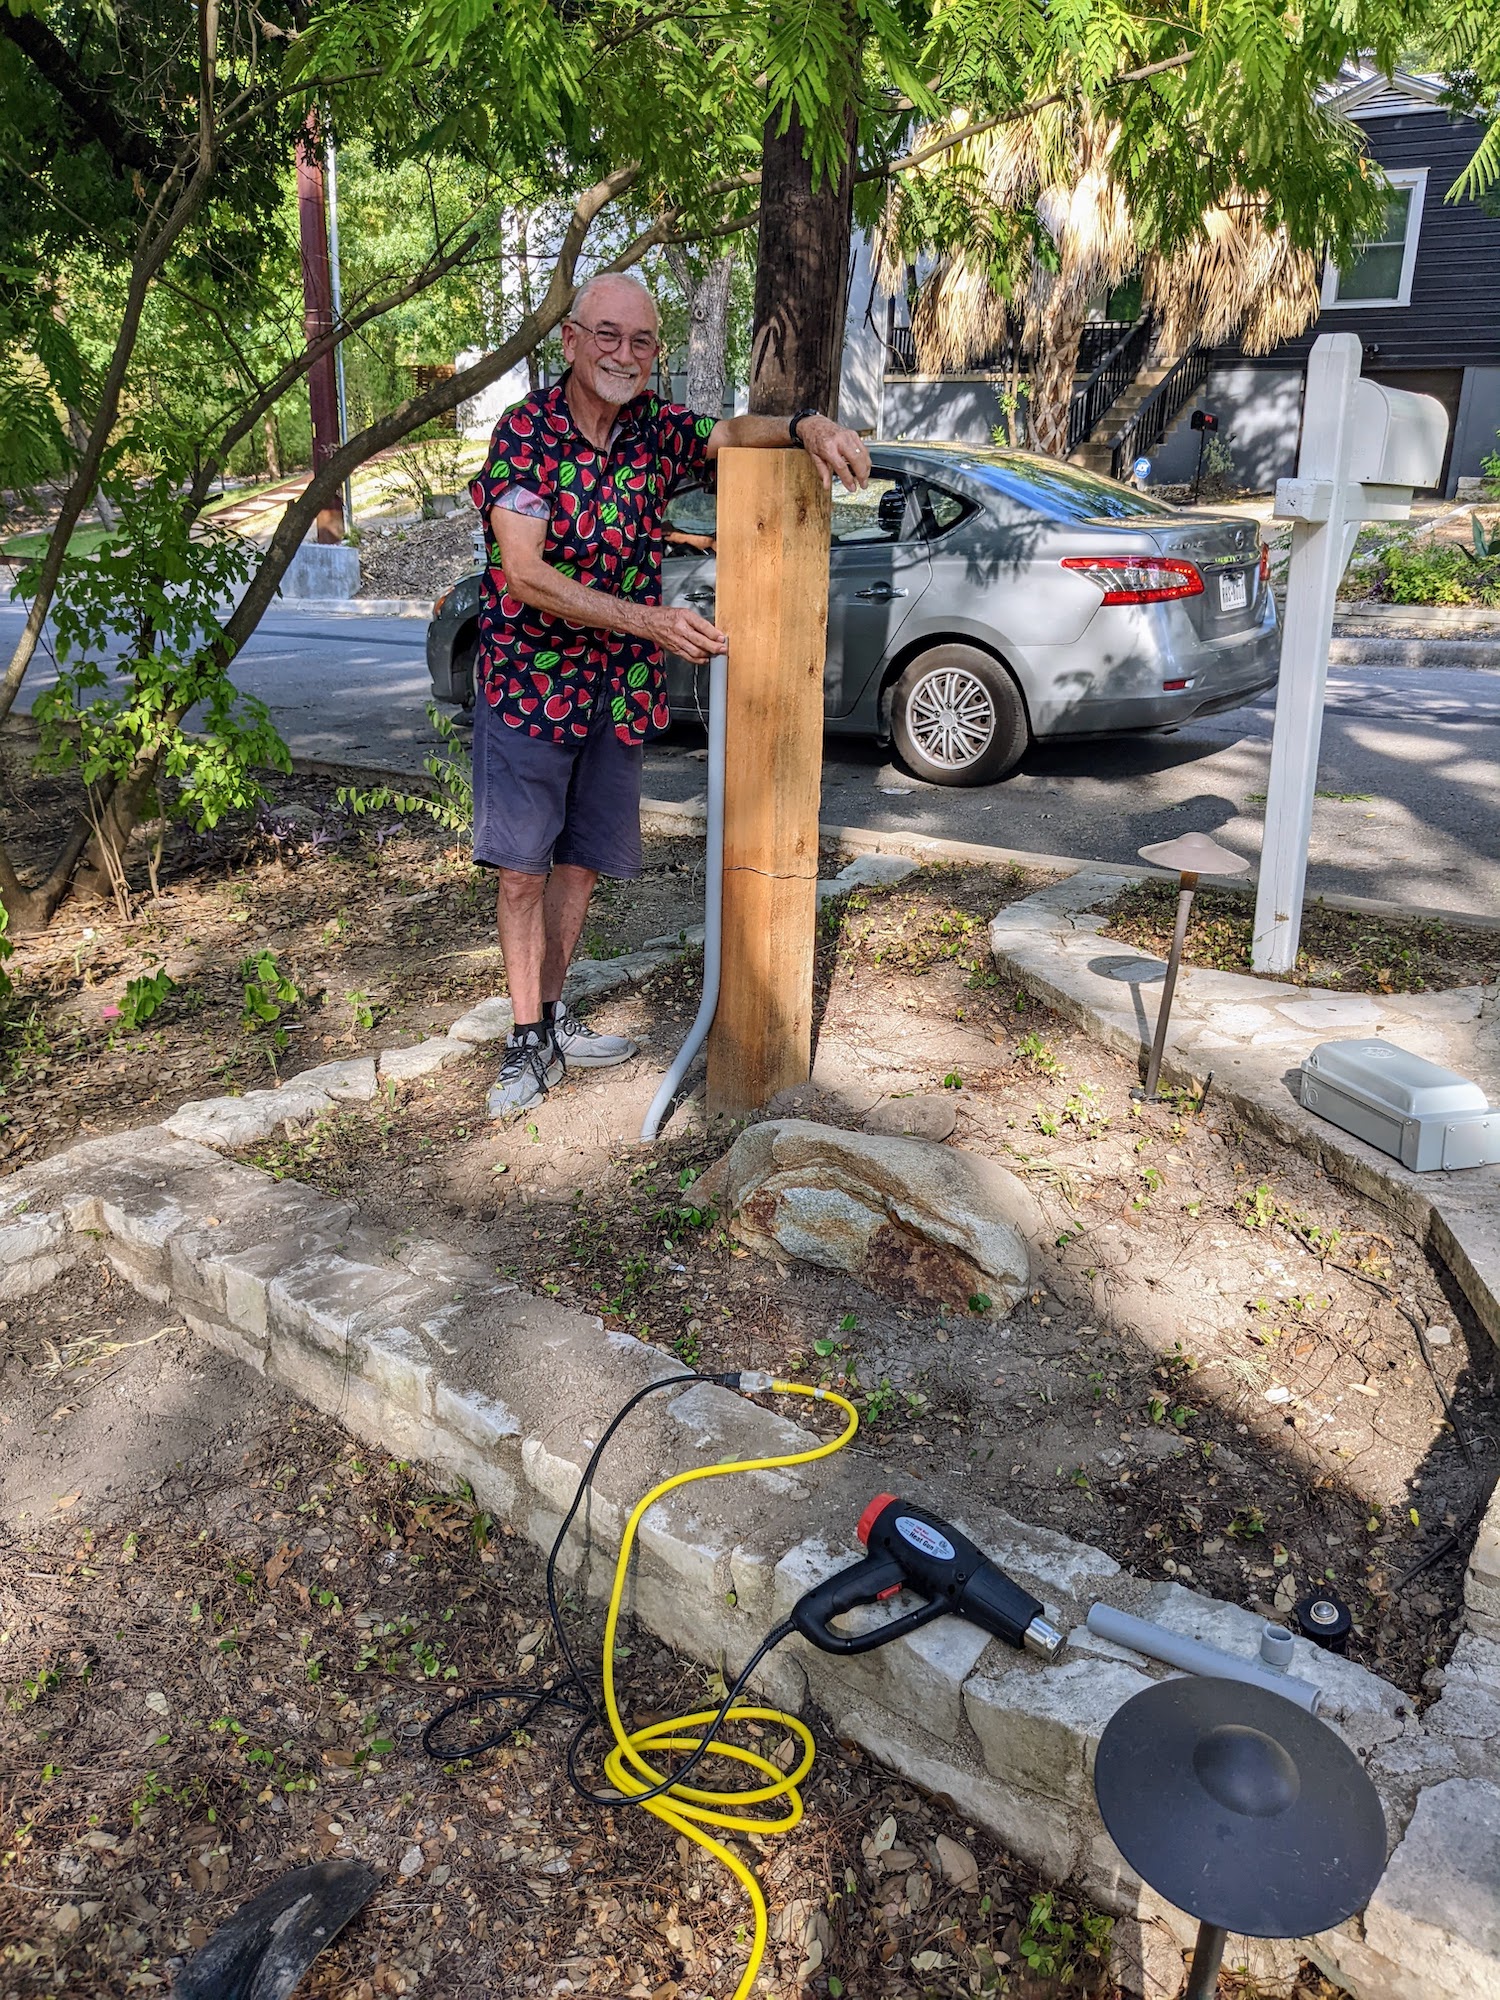
I selected a 6x6 rough-milled cedar post to mount the charger on for aesthetics and durability. Unfortunately, I could only find 10ft lengths of 6x6 so I had to go back and fetch my handheld circular saw to cut the post in the Lowe’s parking lot.
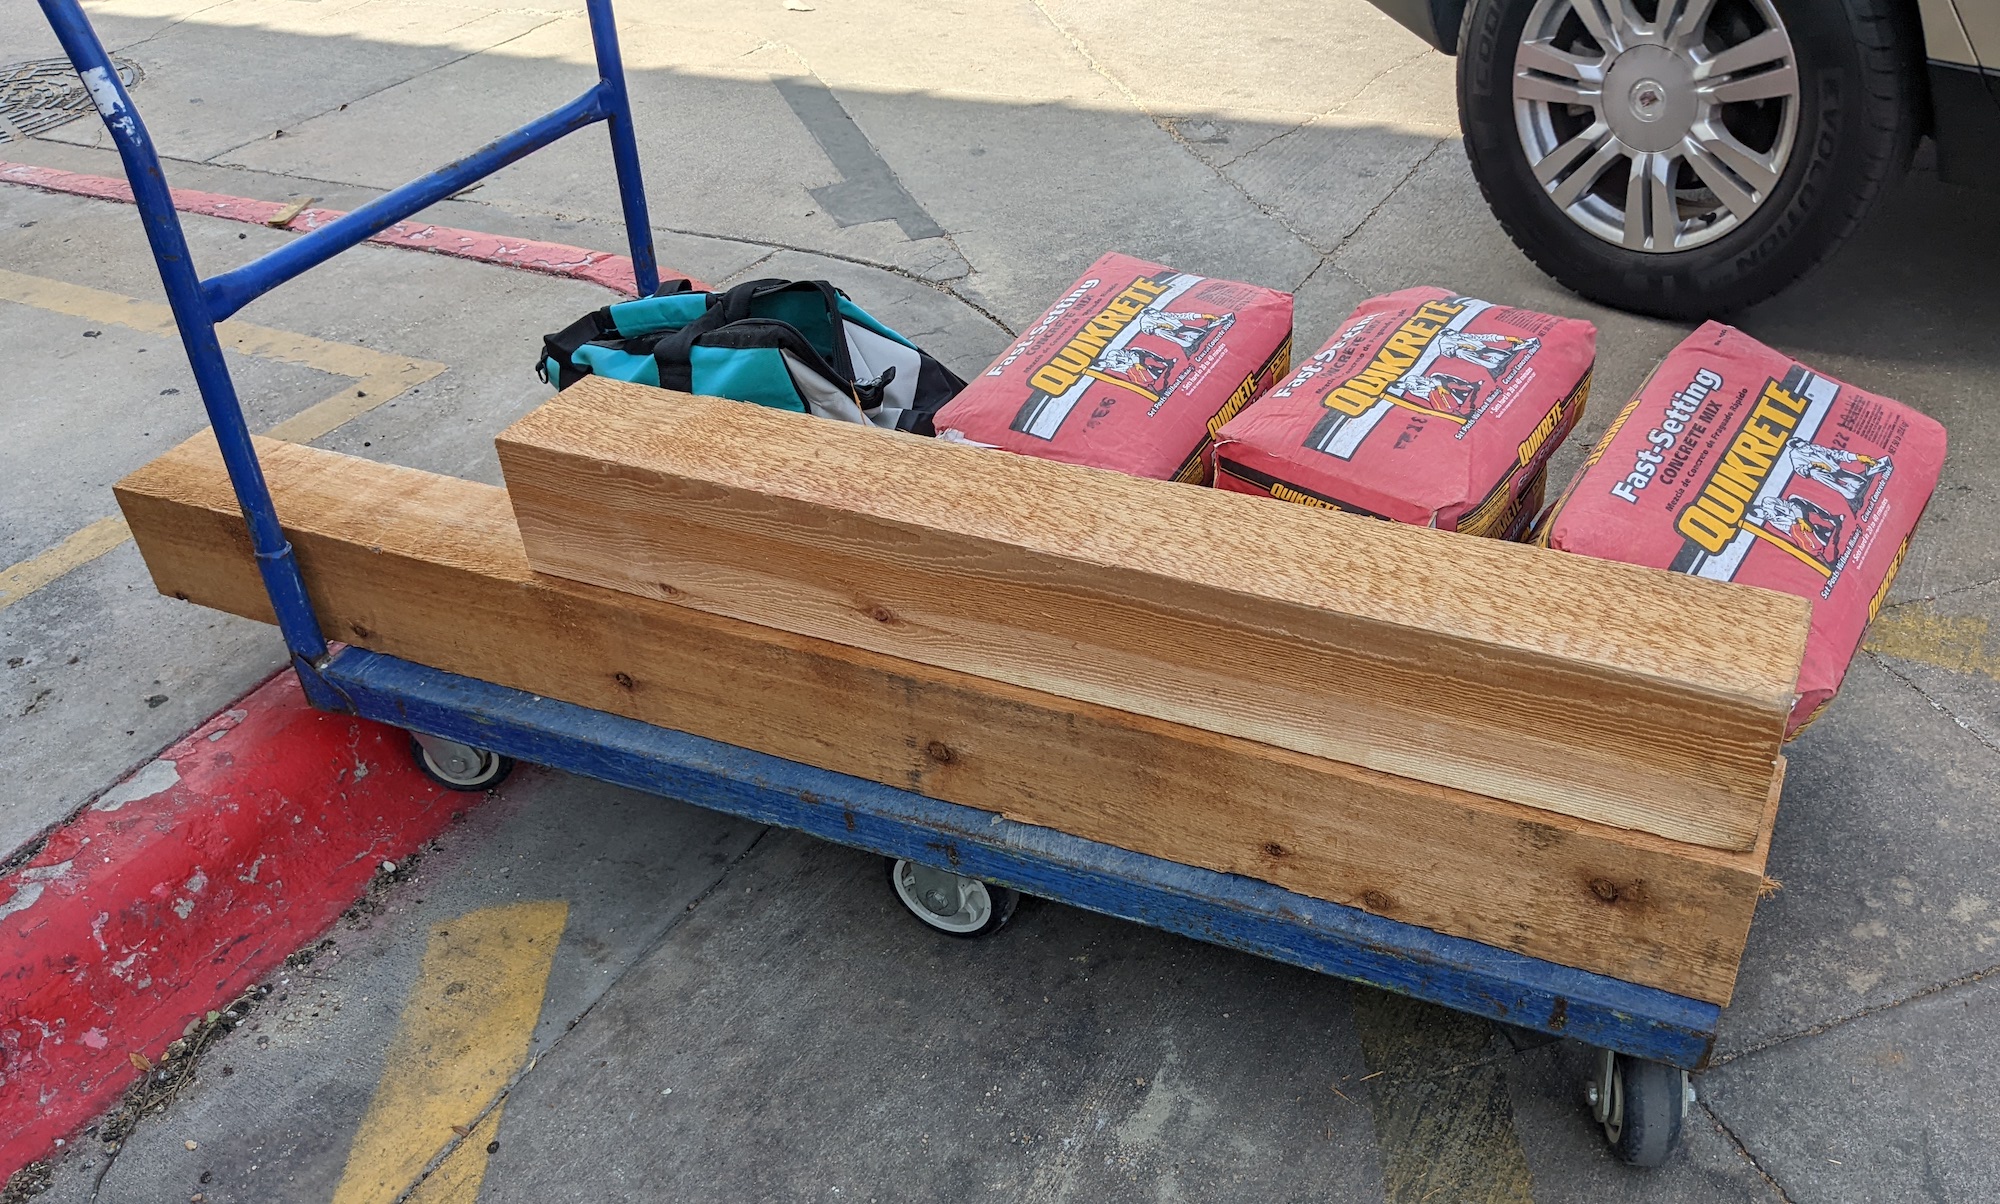
I massively overbought concrete but still ended up with 2ft+ of the post underground–it’s not going anywhere.
Digging the trench and laying conduit
The biggest challenge by far with this project was trenching from the electrical service on the house to the post where I installed the charger. This was about 45ft up a gentle grade, and to meet code I needed to bury the conduit at least 18 inches below grade. The trench only needed to be wide enough to fit the 1.5" wide conduit, but it’s hard to make such a narrow hole.
CALL BEFORE YOU DIG! You never know what underground water, electrical, or gas lines might run through your property. Luckily with just a couple of days notice to 811, you can have all of them marked for free. I used this service to have my gas line marked (it was on the other side of the yard) and to confirm there were no other underground lines in my planned path.
You can buy a power trencher for this kind of work, which is basically a chainsaw that cuts dirt. I considered this, but without any experience using one I was worried about safety and tearing up my yard. So, I decided to hand dig. This was really hard work, and it took me about 10 hours spread across two weeks to finish the job. I used a post hole digger to cut down through dirt and roots and a trenching spade to remove spoil.
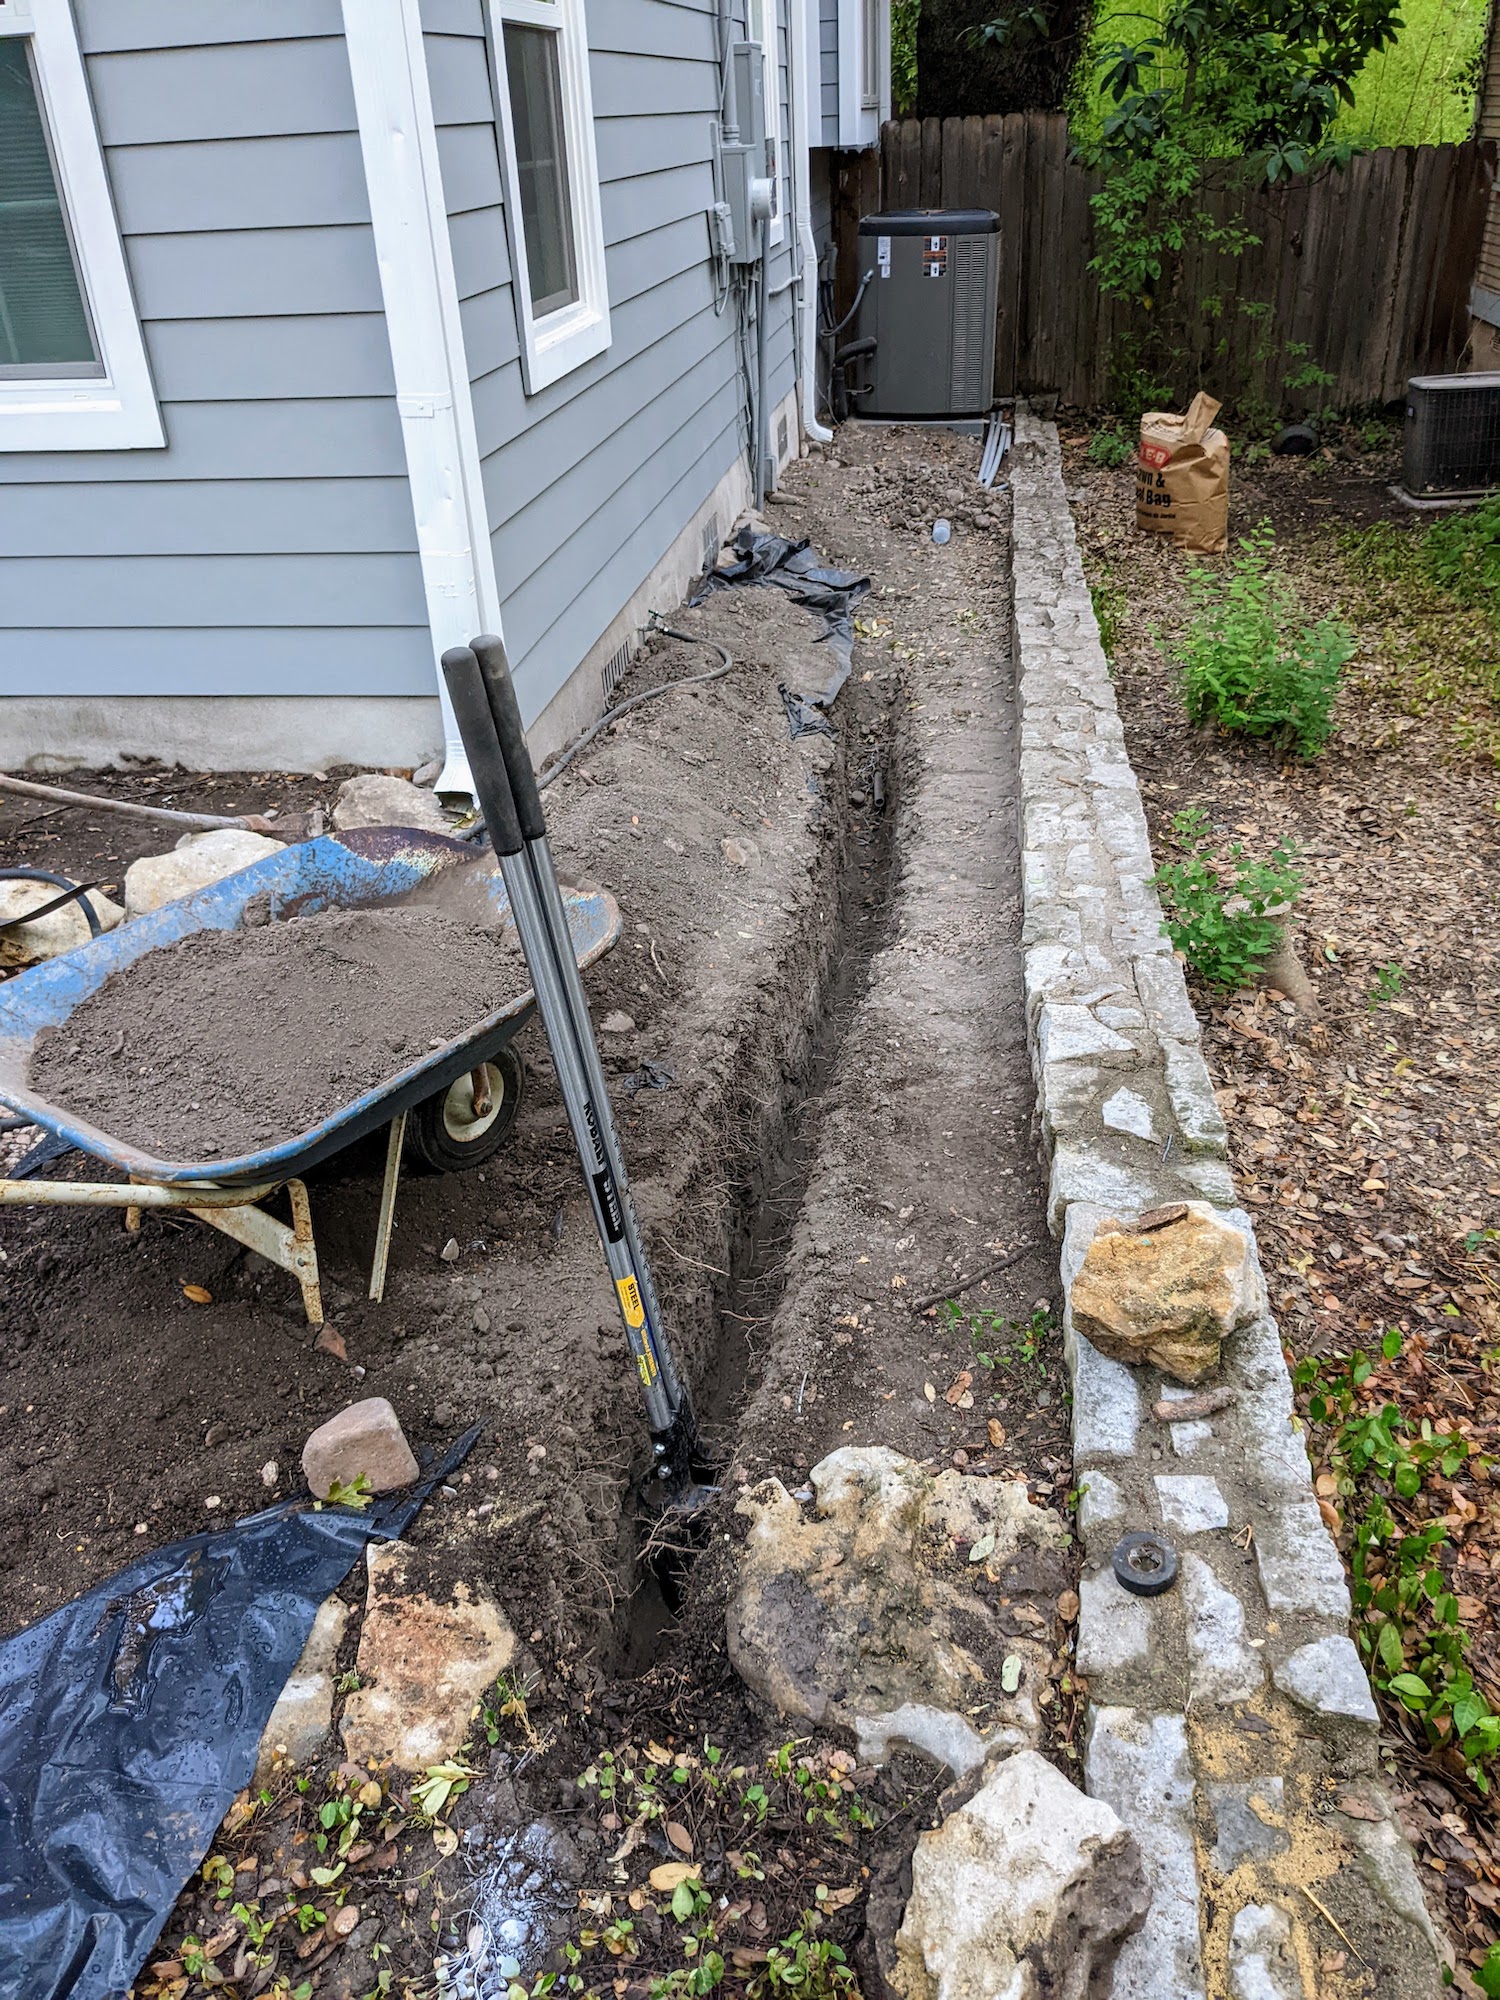
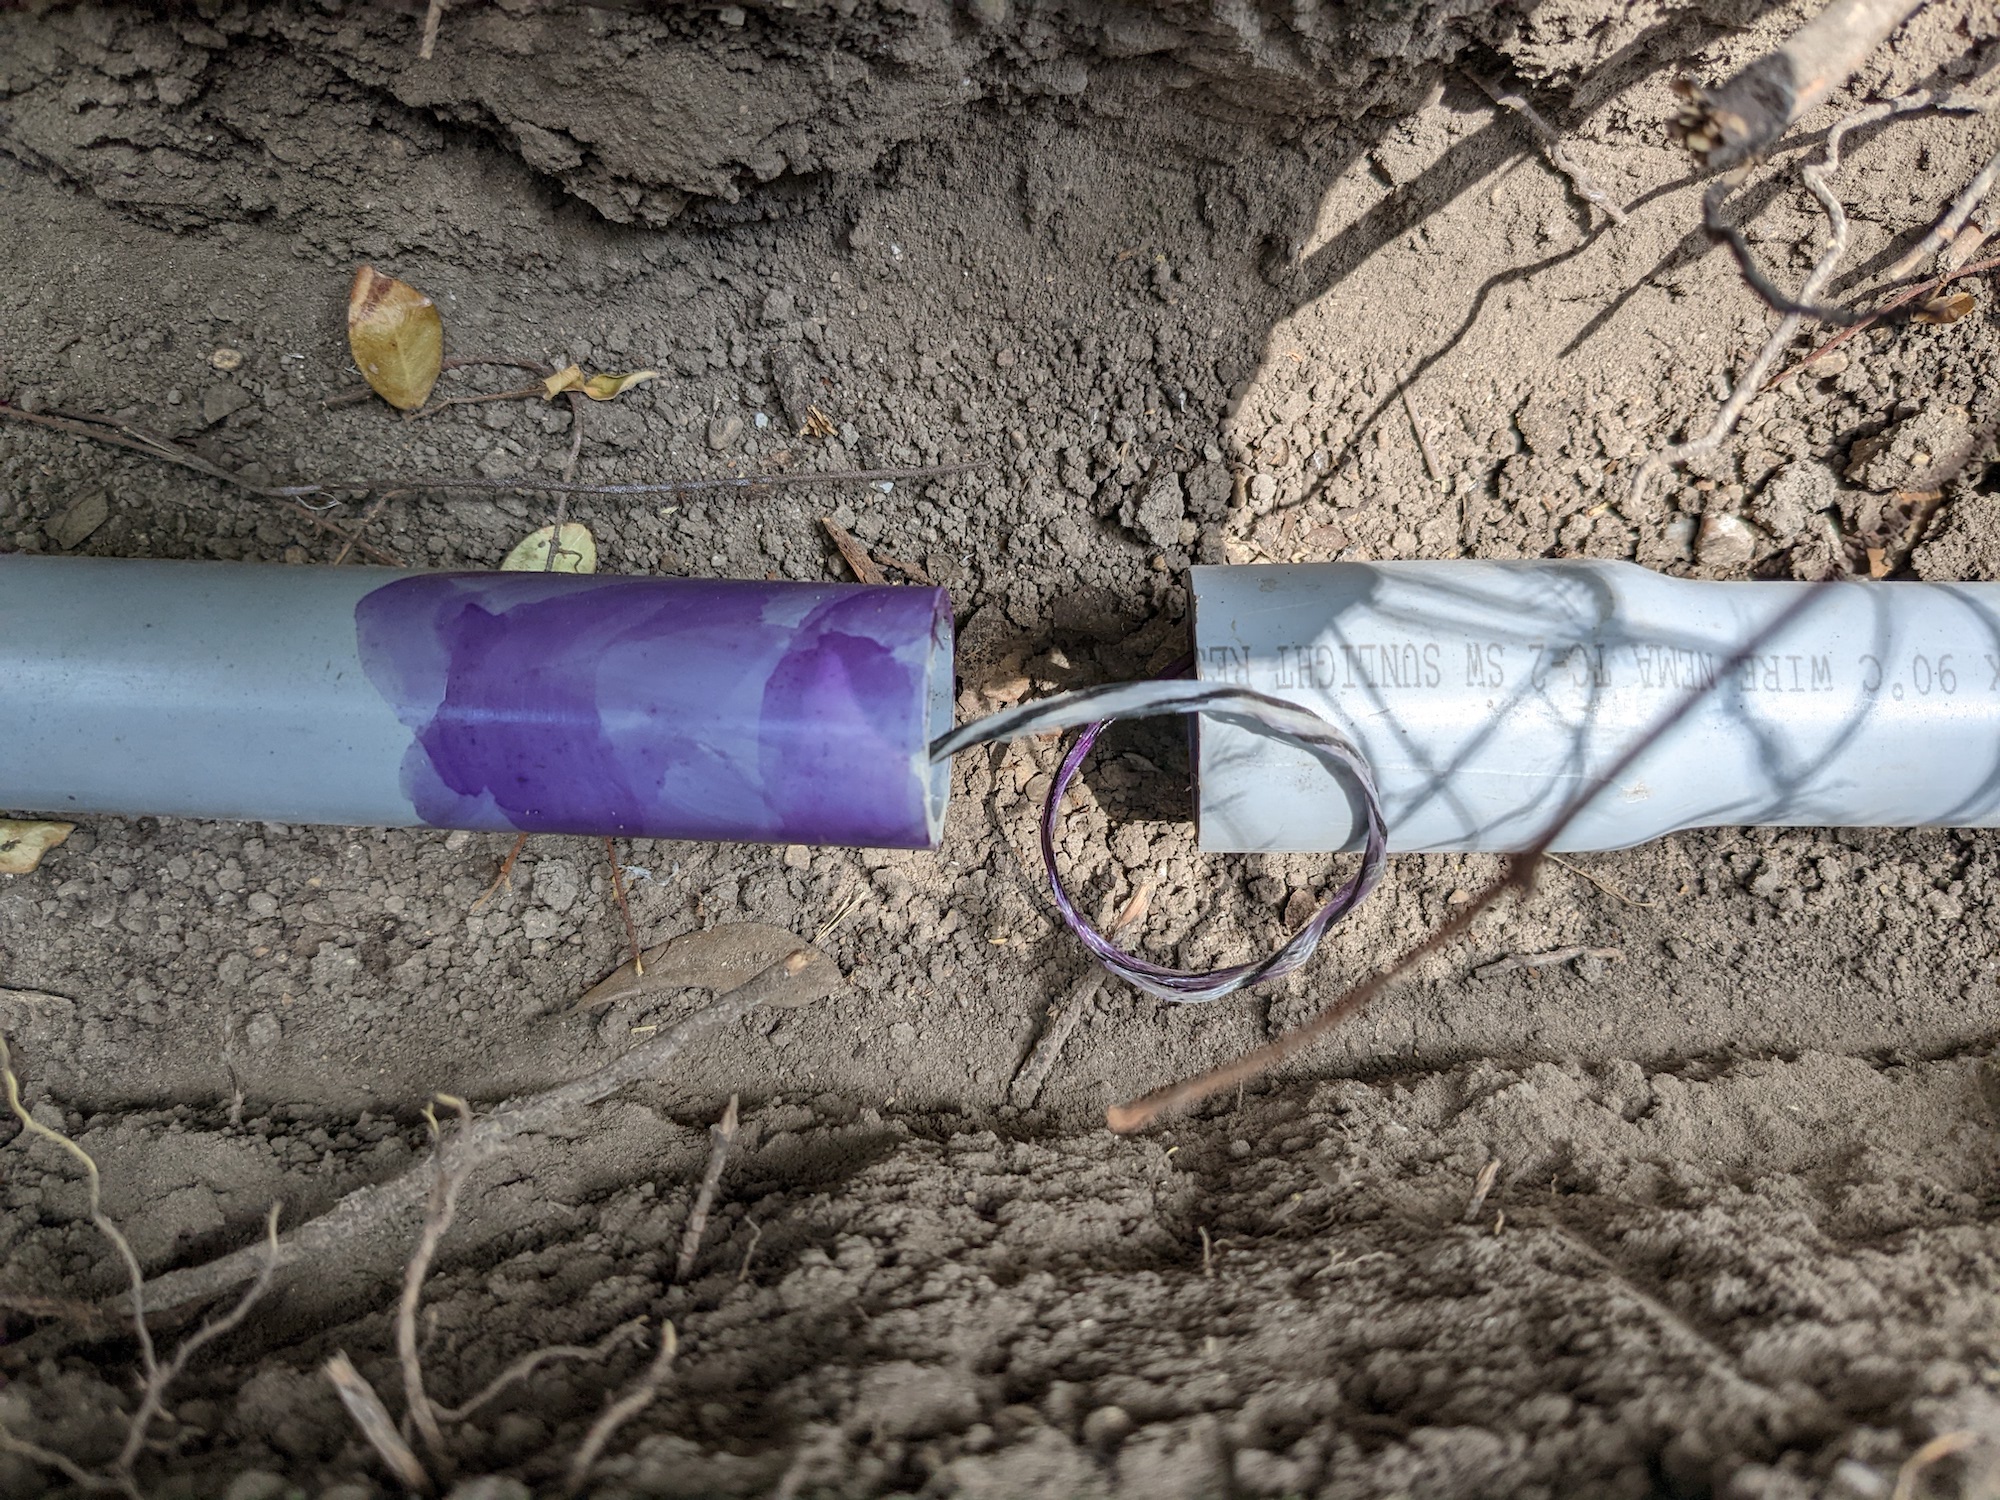
I dug in about 15 foot sections, laying down 10 foot sections of bell-end conduit with nylon string already threaded through. I used standard PVC primer and cement to weld the sections together, then backfilled the section with dirt and kept digging.
The trickiest part was getting the conduit under a small retaining wall an then through a 90-degree bend to meet the post.
Finally, Marc and I used a heat gun to put two gentle bends in the conduit so it would rise as close as possible to the post while giving room for the concrete footing.
Pulling the wire
The next step was to pull the four conductors (two poles of 220V, neutral, and ground) through the conduit. I had fed 250-lb test nylon string through it as I buried it, so the next task was to attach the conductors to the string as securely and smoothly as possible. This is called making the ‘head’ in electrician lingo. Not pictured: I wrapped this all in gaffer’s tape.
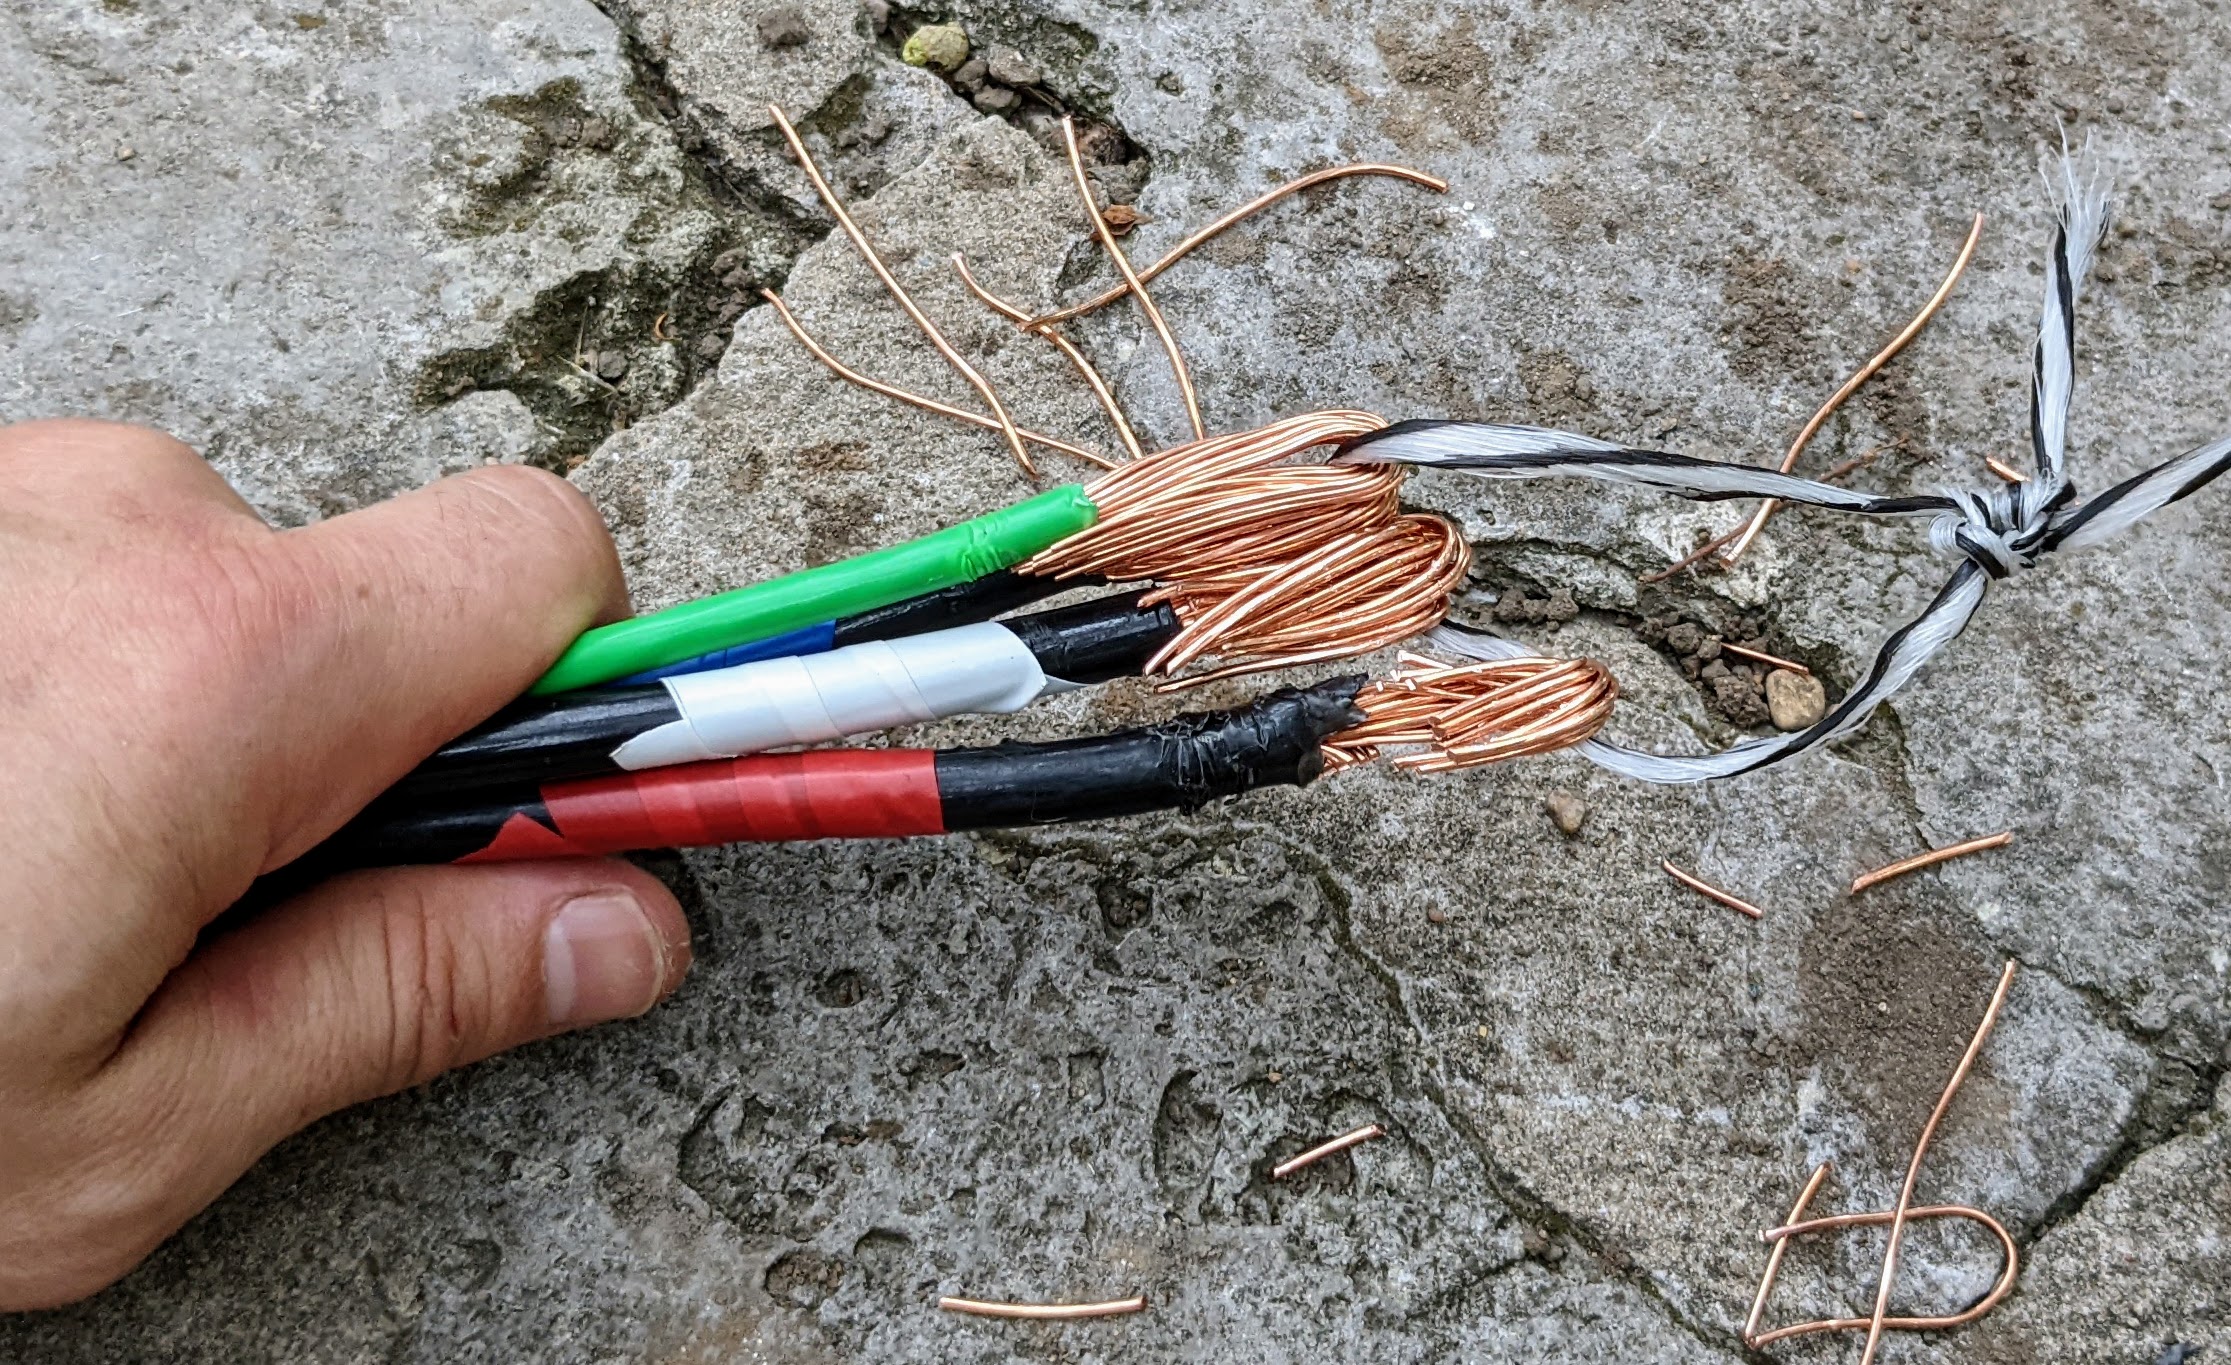
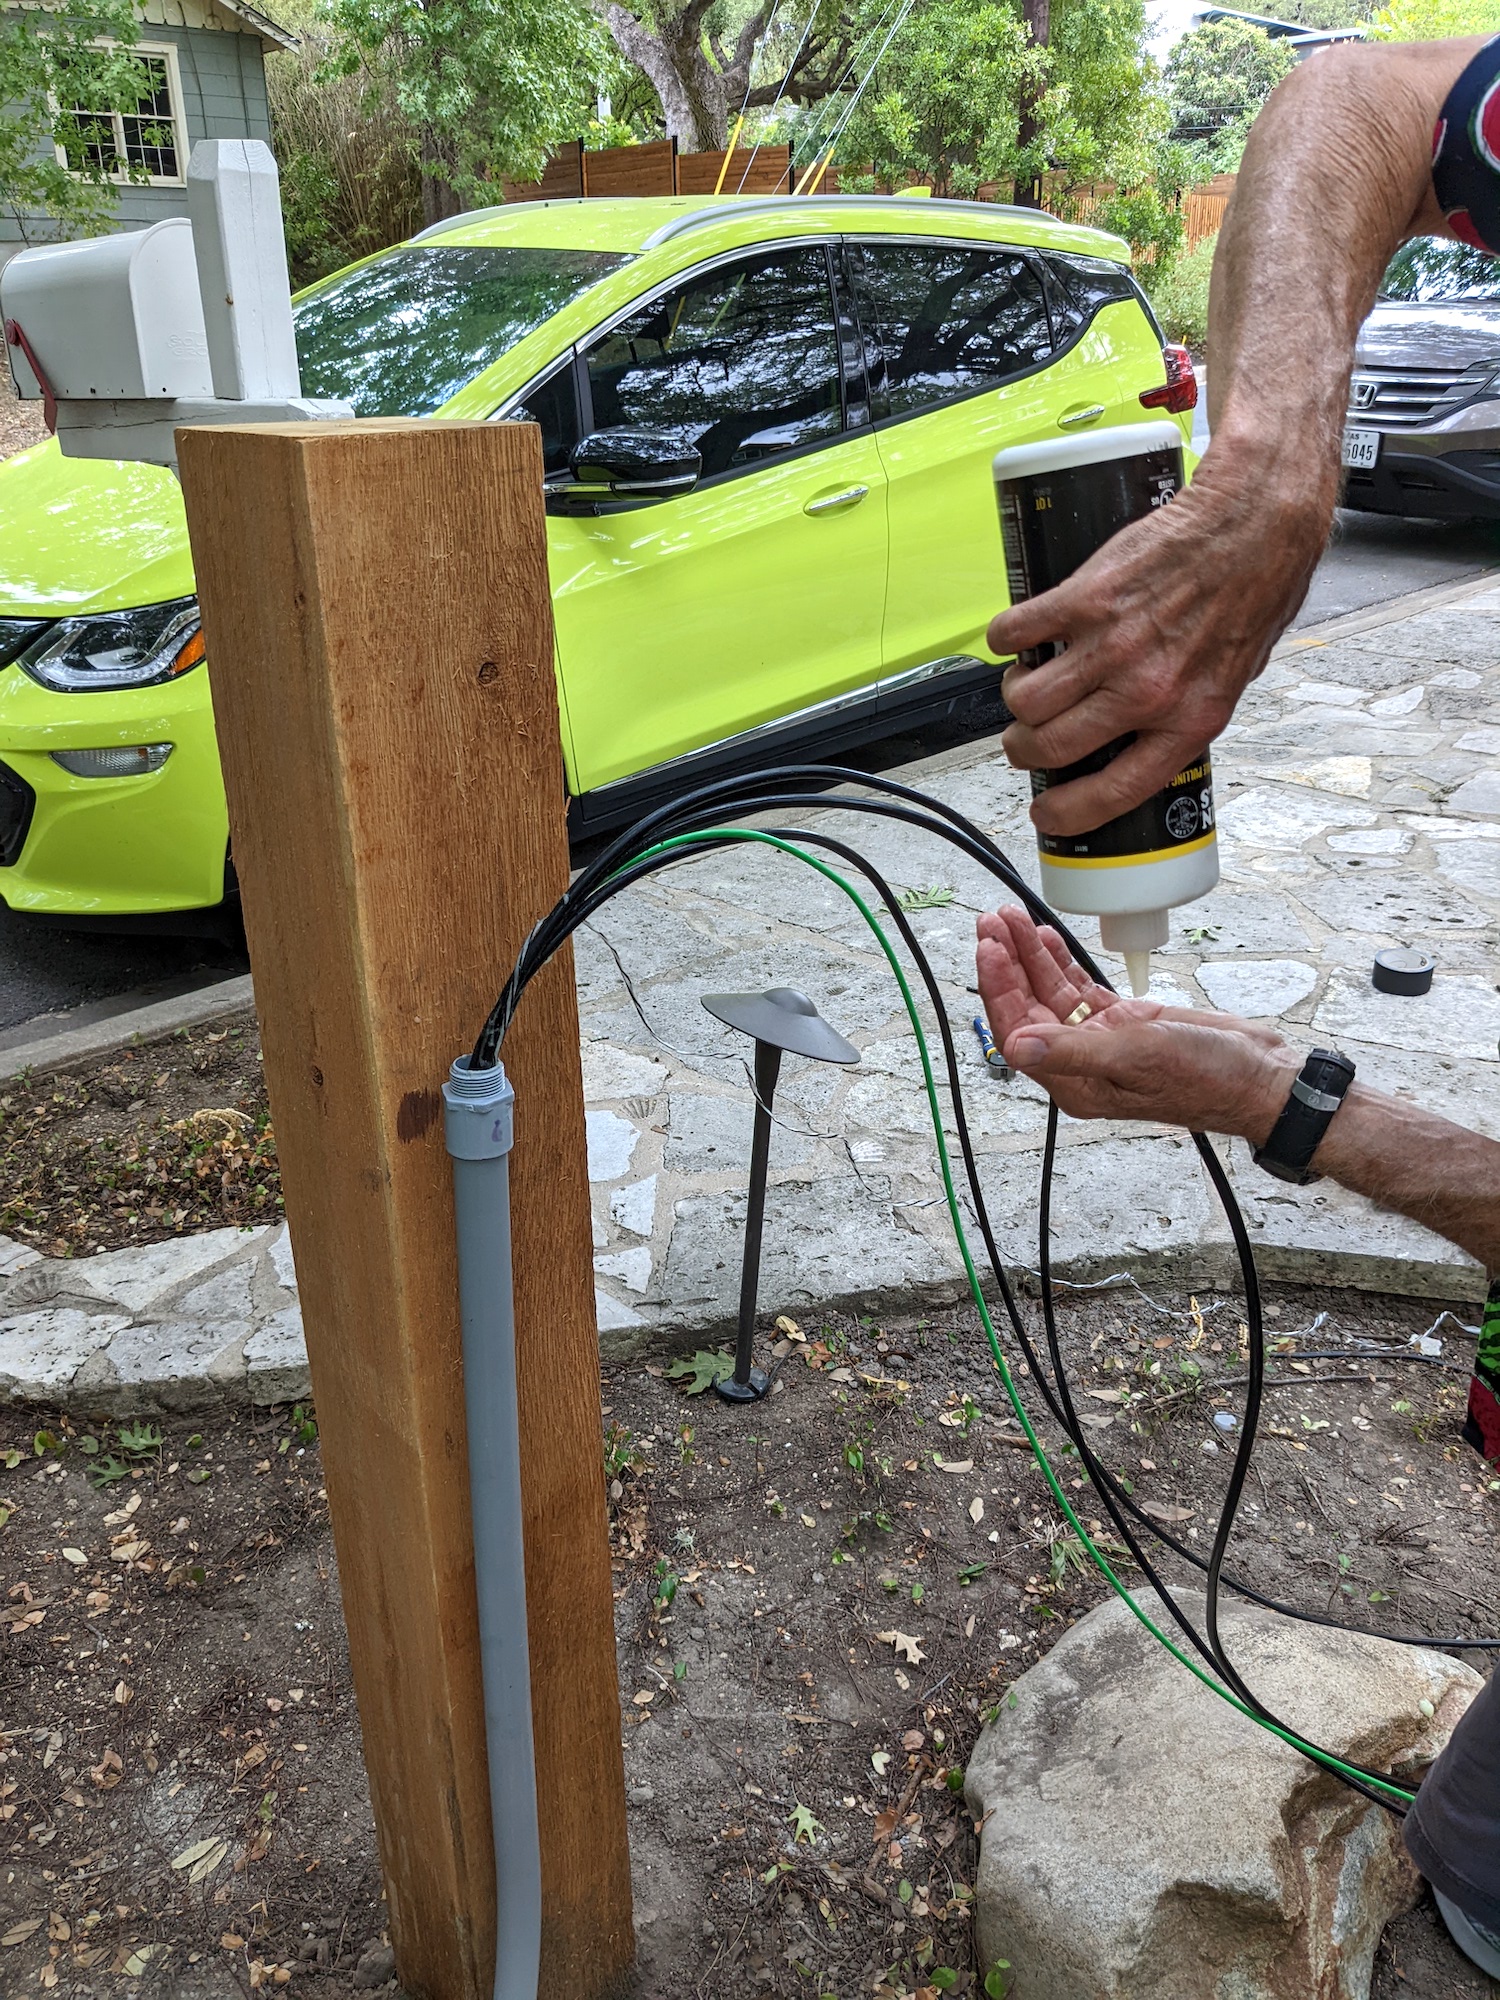
Marc then fed this head down through the conduit at the post while I pulled on the nylon string from the electrical service box. To ease the way, we liberally smeared the wires with wax-based pulling lubricant.
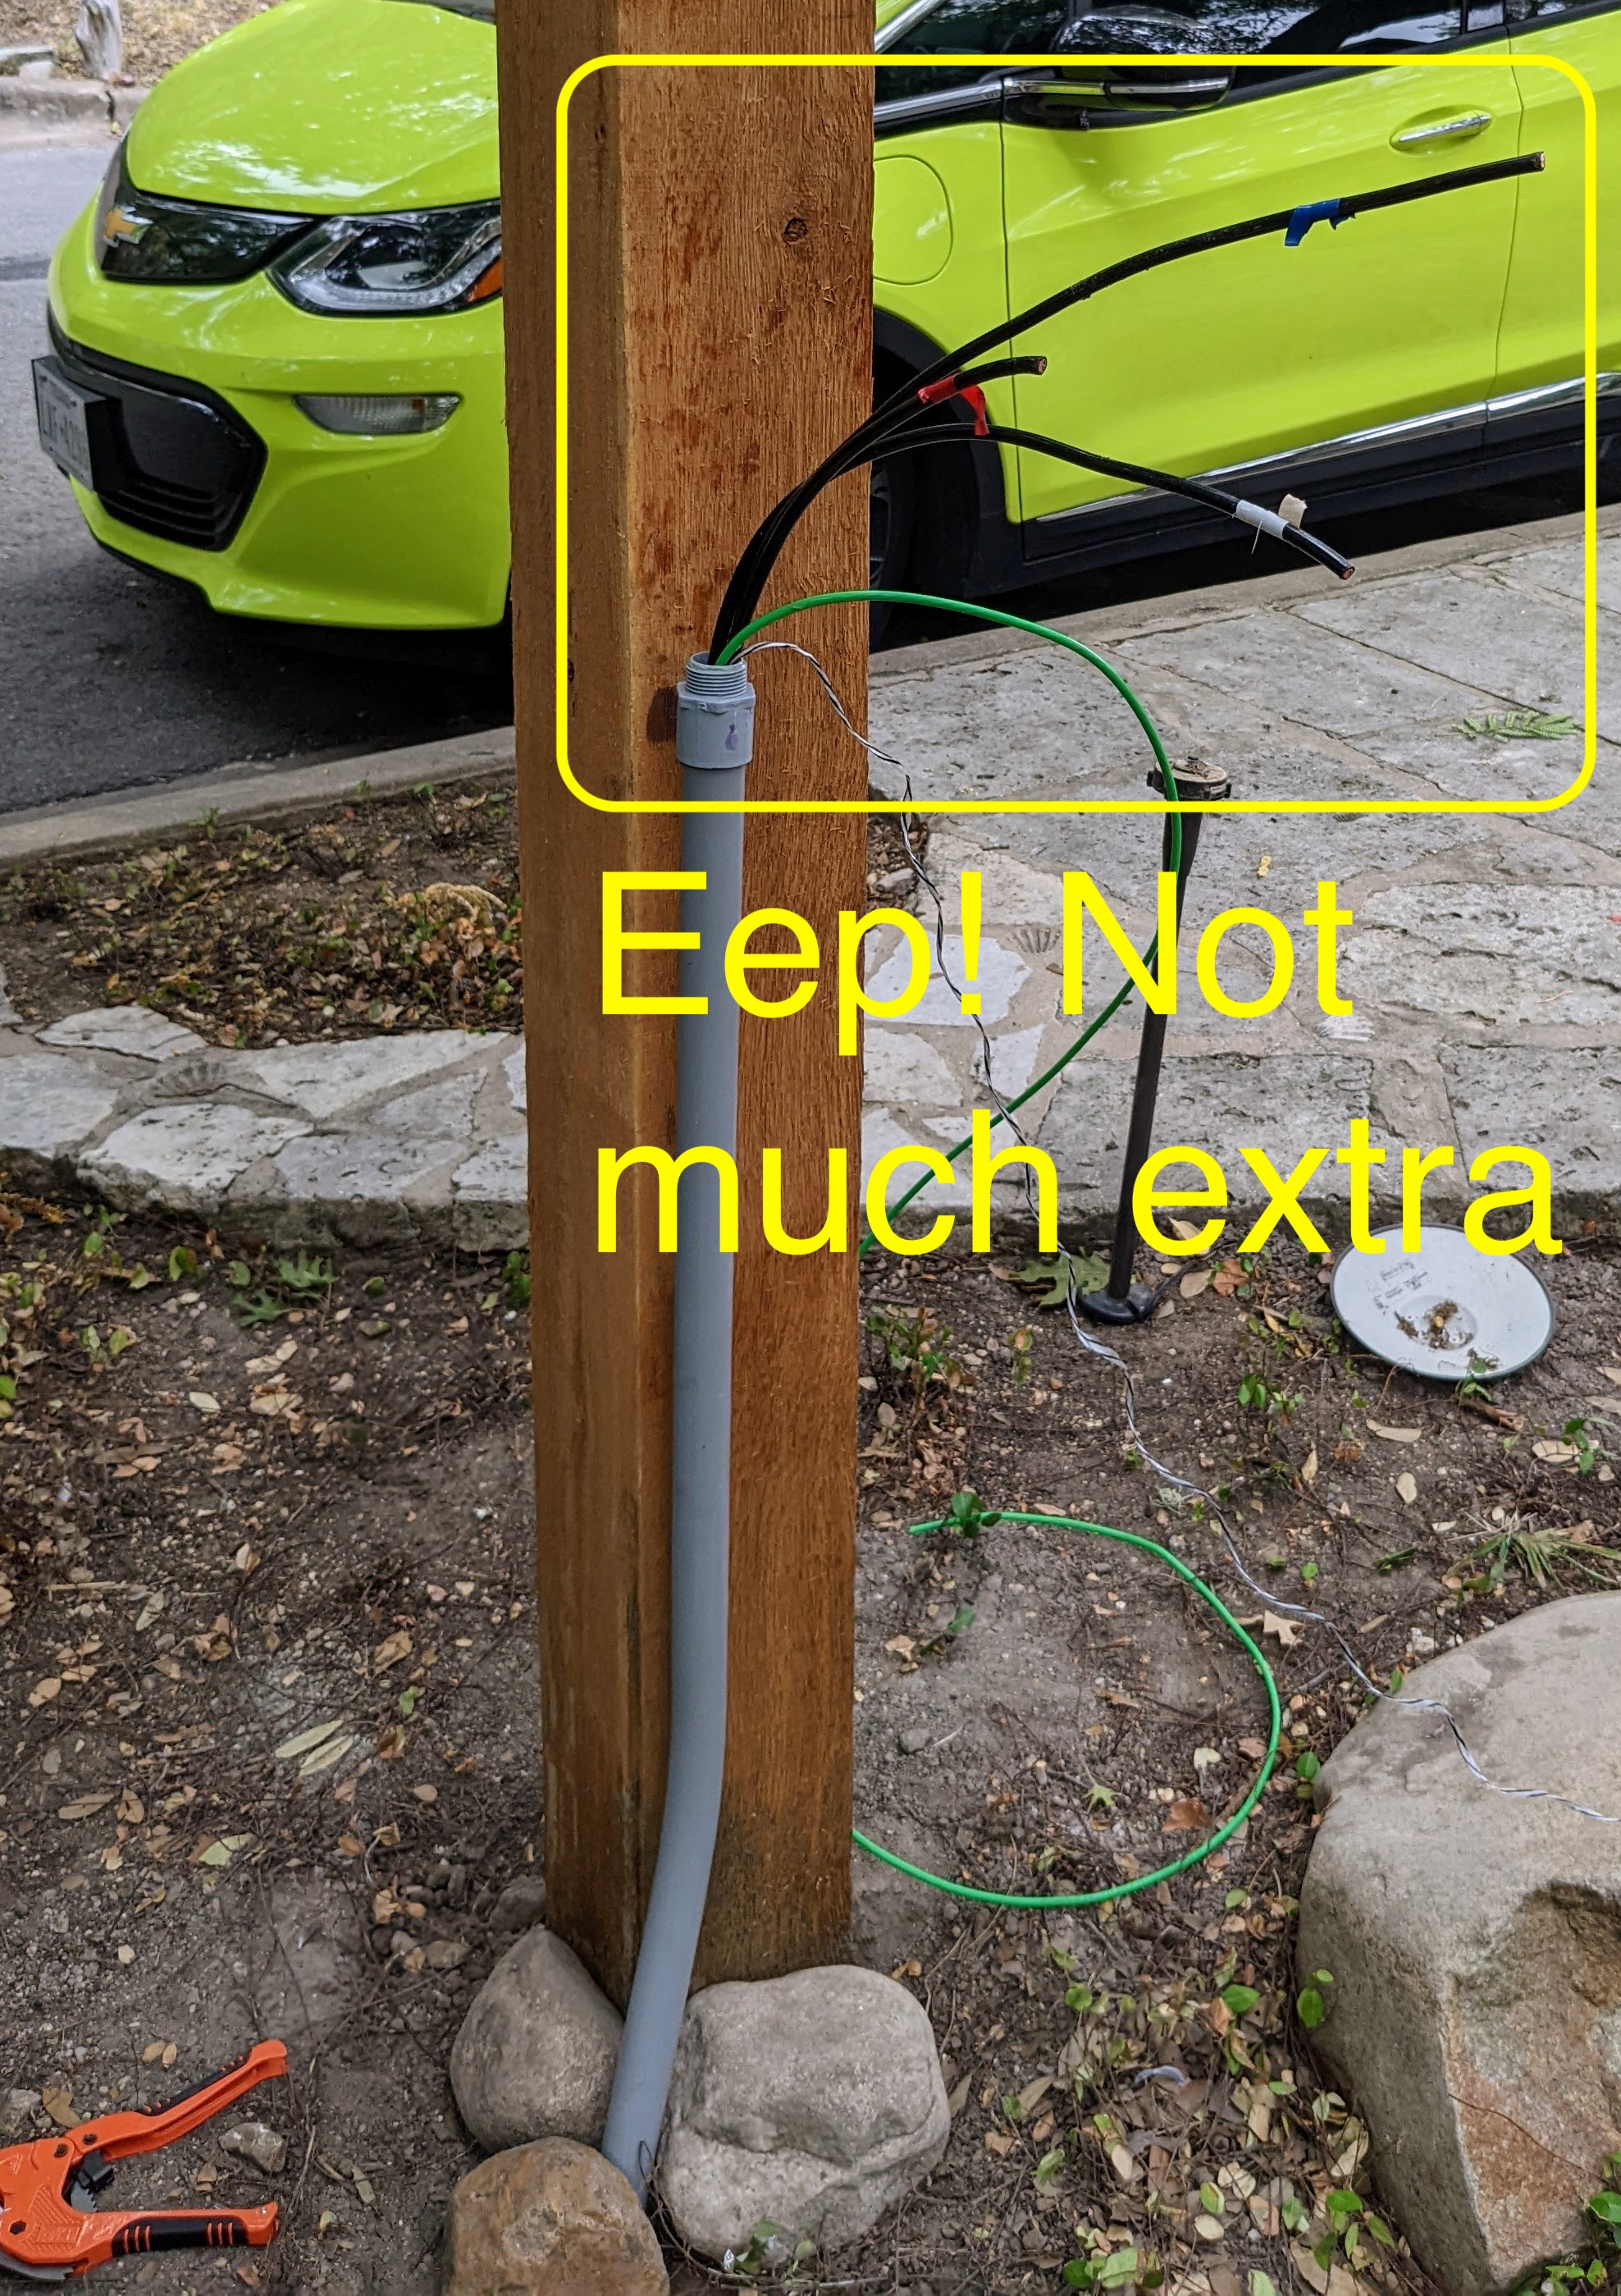
Pulling was much harder than I expected. The conduit wasn’t that full, but we had two 90-degree turns plus a couple of gentle bends. I also think there was a significant amount of dirt in the conduit that ended up getting caught up against the ‘head.’ In retrospect I wish I had used 2" conduit, but in the end we got the head to pop out at the service box.
Although I thought I budgeted for about 10 spare feet of conductor, we barely squeaked by, with less than two feet left to pull on the post side. Phew! I would definitely overbuy on length here and/or do a more careful estimation of how much length there really was to cover including the rises at both ends.
Wiring up the charger
Before even connecting the circuit to the house service, I installed the charger subpanel. The red-marked conductor had only a few inches to spare, but we got lucky. The 50A NEMA 14-50 receptacle includes a neutral, but it is not used by the EV charger, which just uses the two poles of the 220V circuit.
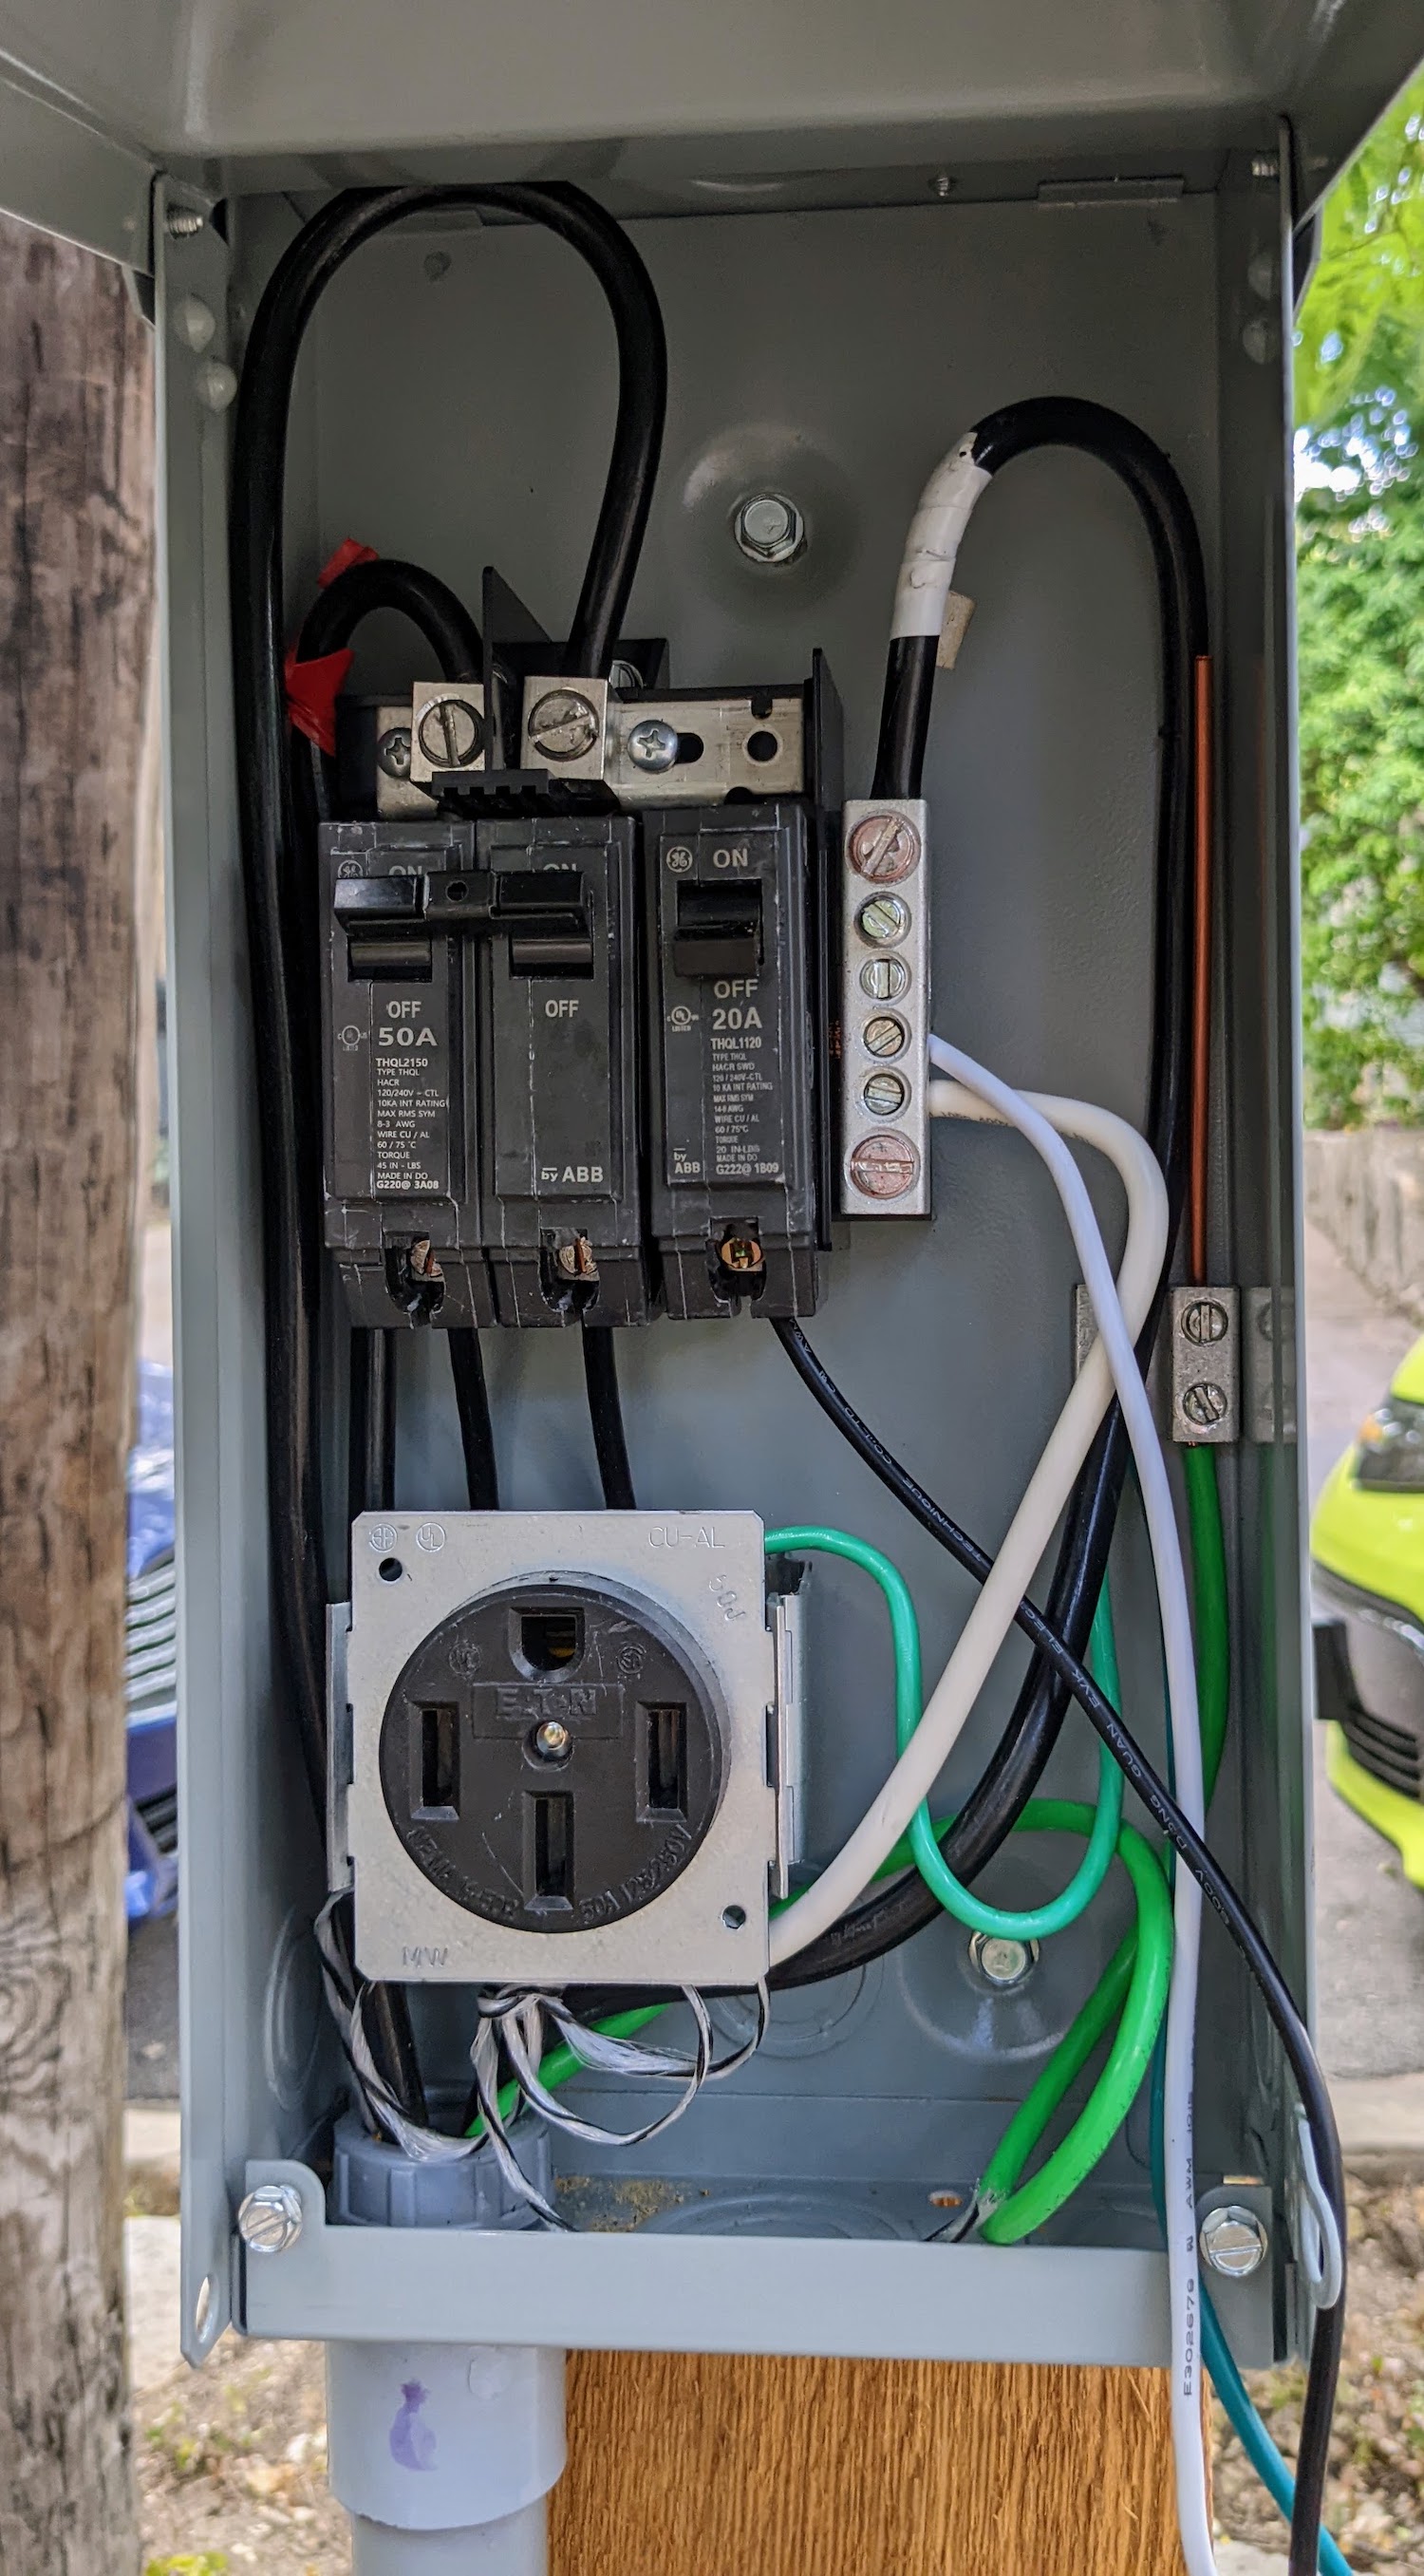
The finished subpanel mounted to the post:
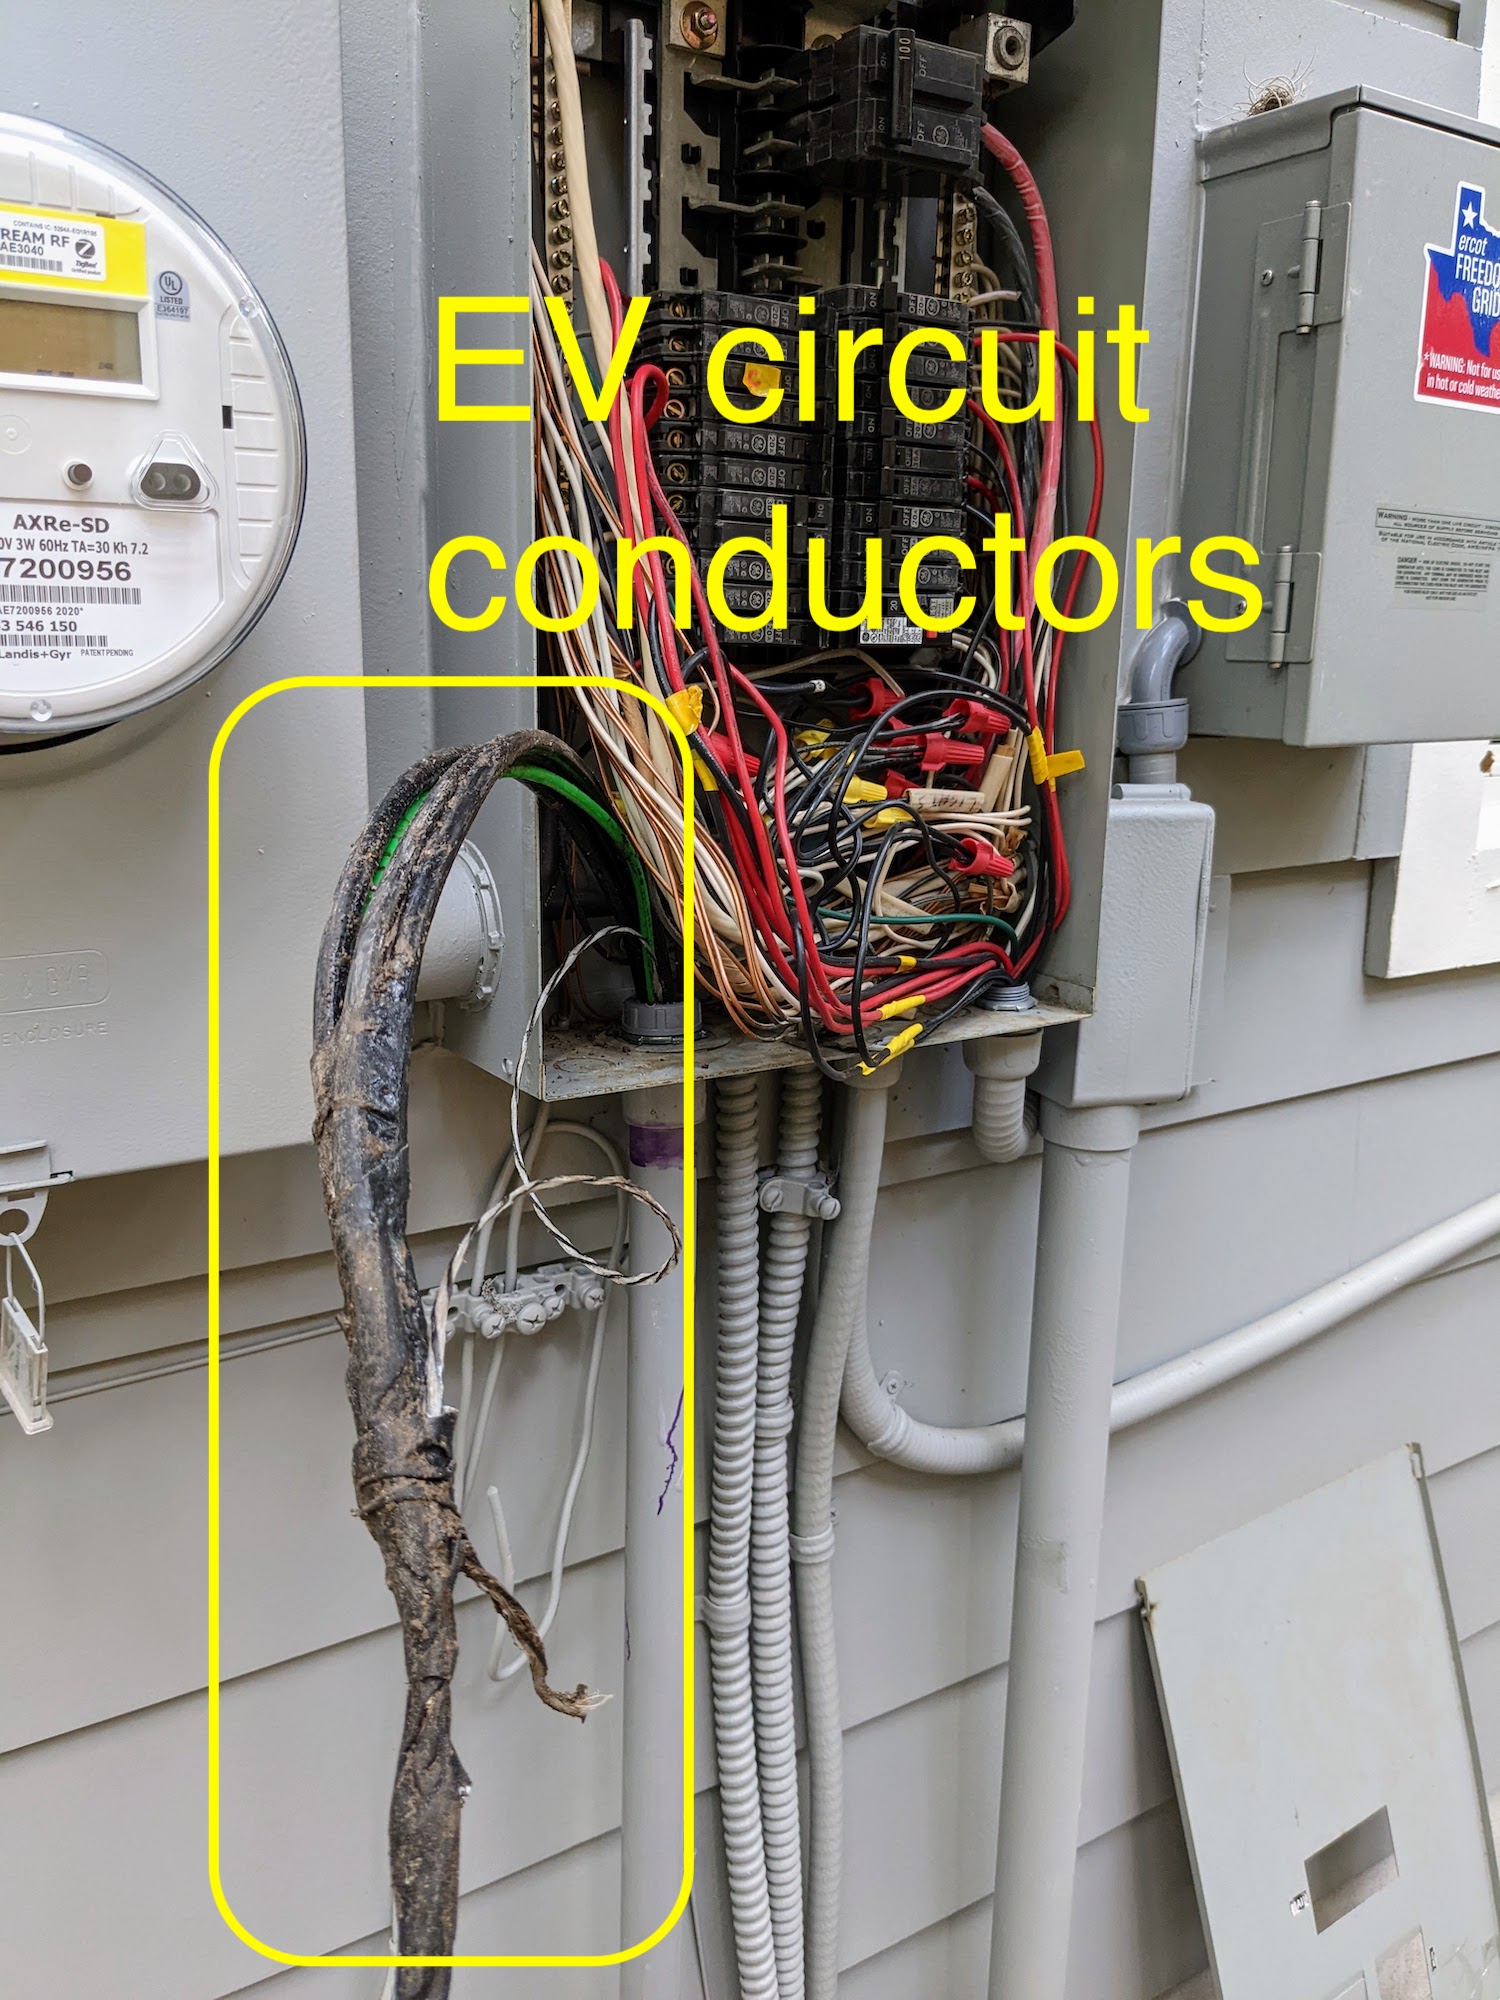
The final and scariest part was to connect the subpanel to a new 60A circuit on the main house service. The routing these huge wires was beastly; it’s pretty crowded in there. You can see the new 60A breaker on the left, opposite the 100A breaker for the subpanel in the addition.

Finally, I wired up the charger itself. I used the NEMA 14-50 receptacle for ease of routing, but if I ever need more than 50A, I can hardwire as well.
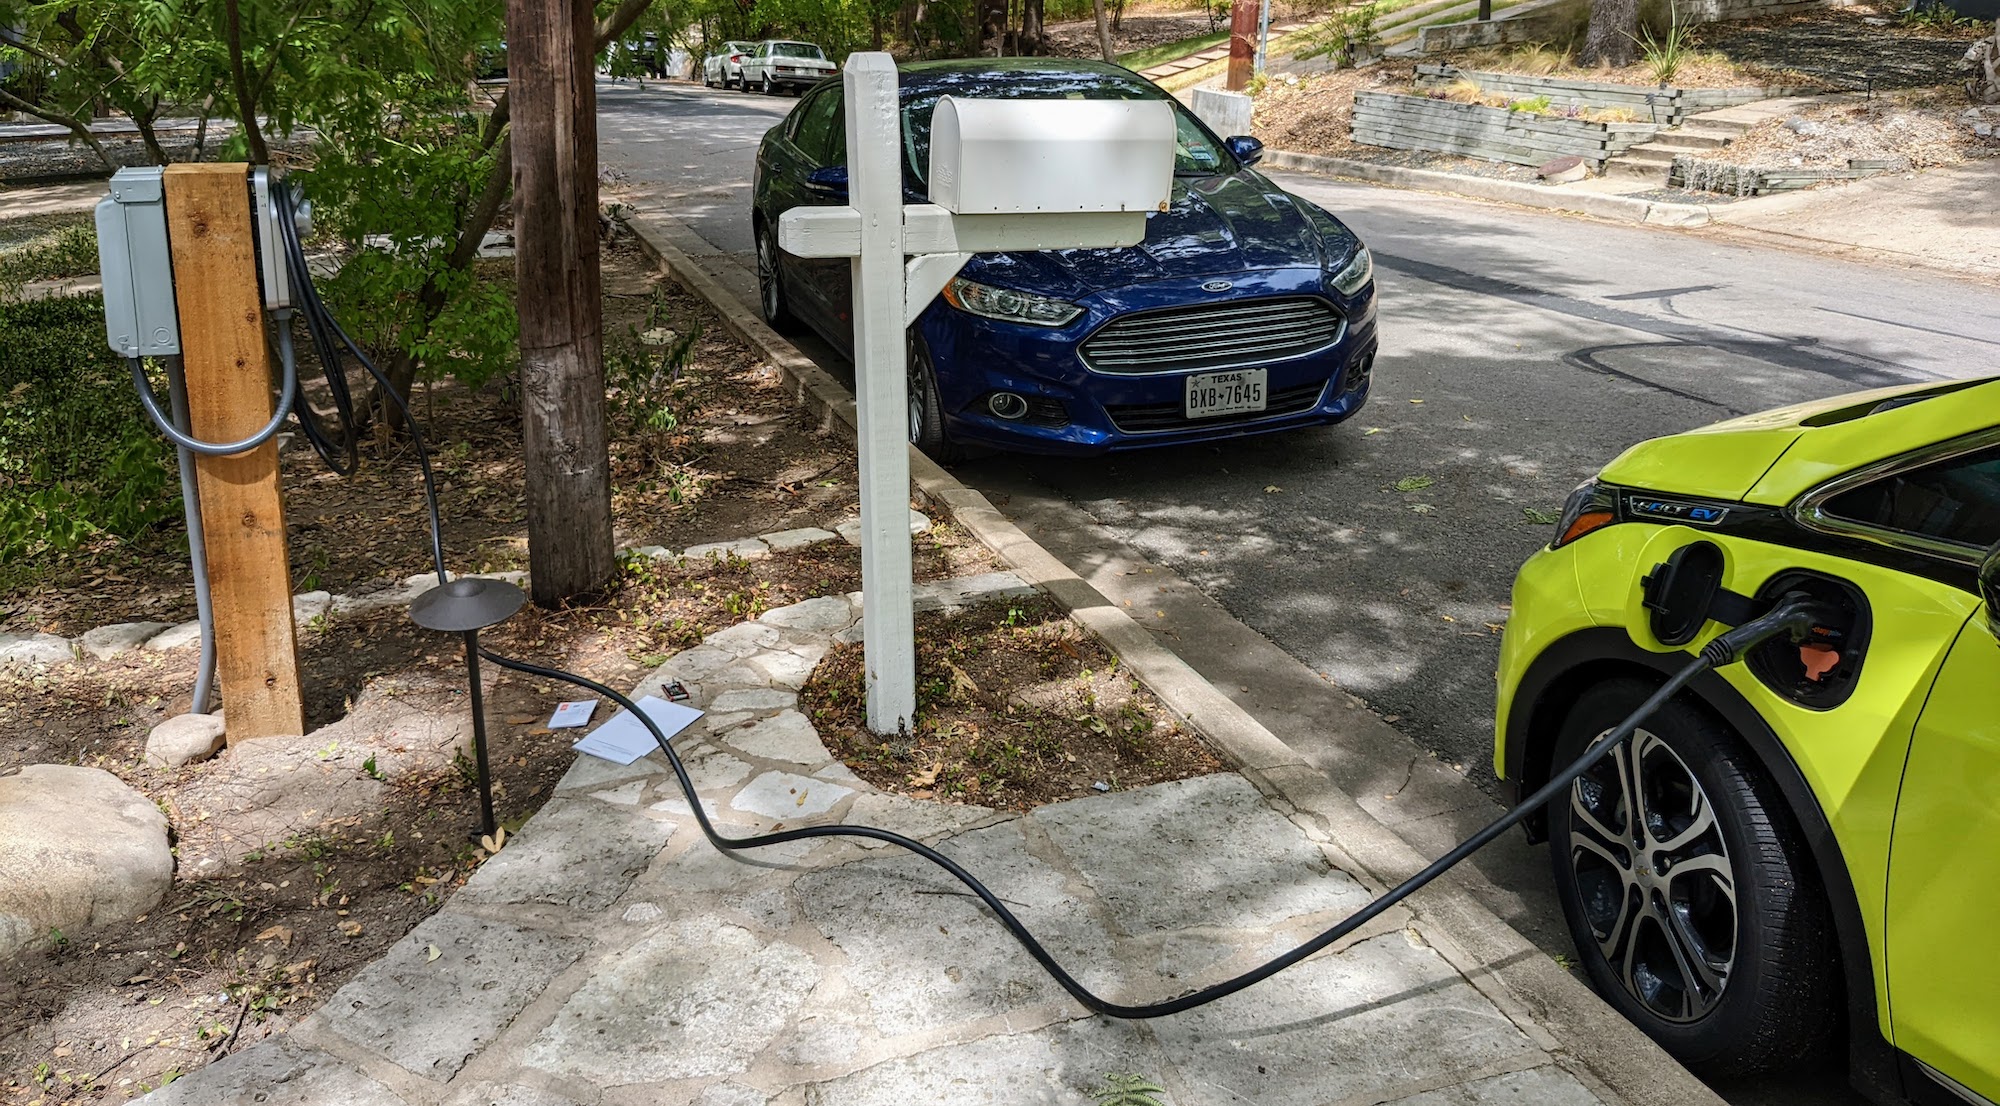
It’s been installed for several months now and has weathered rain and heat just fine. Seemingly everyone asks about the possibility of someone stealing watts by charging their car on my charger, sitting as it is right there by the road. Well, it hasn’t happened yet, although there’s nothing to prevent it. I’ll let you know if any EV owners are either so entitled or so hard up that they try such a thing :)
In all, I saved at least 50% over a professional installation, and I got to learn a bunch about the electrical code and pulling wire through conduit. And also lots of exercise digging a trench!
Comments
Electrical Guy — 2024-11-05 19:08:13
Should have put the conduit in before the cement around the post. Also not a good idea to cement in wood as it rots faster. Just put the post it deep enough for stability without cement. Don’t need a disconnect for 60AMP or less feeds. Code says only great than 60amp… so could have avoided the panel on the back of the post which looks bad. Also should have just hard wired the box to the 60AMP feed as it will deliver the correctly rated voltage to the car. This avoids the cost of the plug , box, 50amp breaker etc.
bryan — 2025-02-14 23:13:52
Awesome, thanks for the feedback! Glad to hear I got this close XD. I do like having the subpanel/disconnect on the post so I can plug in a vacuum.